XNA动画的实现3——关键帧类
上一篇文章我们编写的SimpleAnimationClip只能实现直线匀速动画,要实现复杂的动画,需要编写关键帧类,这个类的保存了一个时刻的变换信息,实际上就是从SimpleAnimationClip提取变换变量封装成的一个类。本篇文章主要参考了《3D Graphics with XNA Game Studio 4.0》(本网站有电子书下载)的9.2 Keyframed animation和9.3 Curve interpolation。
关键帧类Keyframe.cs的代码如下:
/// <summary>
/// 关键帧类,表示一个动画片段(AnimationClip)中一个指定时刻的状态(包含位置、旋转、缩放信息),
/// 多个关键帧组成一个动画片段。
/// </summary>
public class Keyframe
{
    /// <summary>
    /// 位置
    /// </summary>
    public Vector3 Position { get; private set; }

    /// <summary>
    /// 旋转
    /// </summary>
    public Vector3 Rotation { get; private set; }

    /// <summary>
    /// 缩放
    /// </summary>
    public Vector3 Scale { get; private set; }

    /// <summary>
    /// 此关键帧离开动画开始时刻的时间
    /// </summary>
    public TimeSpan Time { get; private set; }

    /// <summary>
    /// 创建一个关键帧
    /// </summary>
    public Keyframe(Vector3 Position, Vector3 Rotation,Vector3 Scale,TimeSpan Time)
    {
        this.Position = Position;
        this.Rotation = Rotation;
        this.Scale = Scale;
        this.Time = Time;
    }
}
而此时动画片段类AnimationClip类的作用就是保存一个关键帧集合,然后依次对这个集合中的关键帧变换变量进行插值运算,并最终得到变换矩阵。代码如下:
/// <summary>
/// 关键帧之间插值模式
/// </summary>
public enum LerpMode
{
    /// <summary>
    /// 线性差值
    /// </summary>
    Linear,

    /// <summary>
    /// 曲线插值
    /// </summary>
    Curve,
}

/// <summary>
/// 动画片段类,这个类保存一个关键帧集合,然后依次对这个集合中的关键帧变换变量进行插值运算,并最终得到变换矩阵
/// </summary>
public class AnimationClip
{
    Vector3 position,rotation,scale; // 当前时刻的位置、旋转和缩放
    TimeSpan elapsedTime = TimeSpan.FromSeconds(0); // 动画当前播放流逝的时间
    List<Keyframe>keyframes; // 关键帧集合

    /// <summary>
    /// 变换矩阵
    /// </summary>
    public Matrix Transform { get; private set; }

    /// <summary>
    /// 是否循环播放动画
    /// </summary>
    public bool Loop { get;set;}

    /// <summary>
    /// 插值模式 /// </summary>
    public LerpMode LerpMode { get;set;}

    /// <summary>
    /// 创建一个动画片段,默认不循环播放,使用线性插值
    /// </summary>
    public AnimationClip(List<Keyframe> Keyframes)
    {
        this.keyframes = Keyframes;
        //对关键帧根据时间先后进行排序
        keyframes.Sort(CompareKeyframeTimes);

        // 初始位置、旋转和缩放为第一个关键帧的数据
        position = keyframes[0].Position;
        rotation = keyframes[0].Rotation;
        scale =keyframes[0].Scale;

        Loop = false;
        LerpMode = LerpMode.Linear;
    }

    // 按照关键帧的时间属性升序排序的Comparison方法
    int CompareKeyframeTimes(Keyframe a, Keyframe b)
    {
        return a.Time.CompareTo(b.Time);
    }

    public void Update(TimeSpan Elapsed)
    {
        // 更新动画播放的时间
        this.elapsedTime += Elapsed;
        TimeSpan totalTime = elapsedTime;
        TimeSpan end = keyframes[keyframes.Count - 1].Time;

        if (Loop)
            while (totalTime > end)
               totalTime -= end;
        else
        {
            if (totalTime > end)
            {
                position = keyframes[keyframes.Count - 1].Position;
                rotation = keyframes[keyframes.Count - 1].Rotation;
                scale = keyframes[keyframes.Count - 1].Scale;
                // 计算变换矩阵
                Transform = Matrix.CreateScale(scale) * Matrix.CreateFromYawPitchRoll(rotation.Y, rotation.X, rotation.Z) *Matrix.CreateTranslation(position);
                return;
            }
        }

        int i = 0;
        // 获取当前关键帧的索引
        while(keyframes[i + 1].Time < totalTime)
            i++;
        // 获取从当前帧开始的动画播放时间
        totalTime -= keyframes[i].Time;
        // 获取播放到当前关键帧至下一个关键帧之间的位置,介于0和1之间
        float amt = (float)((totalTime.TotalSeconds) /
            (keyframes[i + 1].Time - keyframes[i].Time).TotalSeconds);
        // 根据插值模式对位置进行插值运算
        if(LerpMode ==LerpMode .Linear )
            position = Vector3.Lerp(keyframes[i].Position, keyframes[i + 1].Position,amt);
        else
            position = catmullRom3D(keyframes[wrap(i - 1, keyframes.Count - 1)].Position,
                keyframes[wrap(i, keyframes.Count - 1)].Position,
                keyframes[wrap(i + 1, keyframes.Count - 1)].Position,
                keyframes[wrap(i + 2, keyframes.Count - 1)].Position,
                amt);

        // 曲线运动中的旋转和缩放仍然是线性插值
        rotation = Vector3.Lerp(keyframes[i].Rotation, keyframes[i + 1].Rotation,amt);
        scale = Vector3.Lerp(keyframes[i].Scale , keyframes[i + 1].Scale, amt);

        // 计算变换矩阵
        Transform = Matrix.CreateScale(scale) *
            Matrix.CreateFromYawPitchRoll(rotation.Y, rotation.X, rotation.Z) *
            Matrix.CreateTranslation(position);
    }

    Vector3 catmullRom3D(Vector3 v1, Vector3 v2, Vector3 v3, Vector3 v4, float amt)
    {
        return new Vector3(
            MathHelper.CatmullRom(v1.X, v2.X, v3.X, v4.X, amt),
            MathHelper.CatmullRom(v1.Y, v2.Y, v3.Y, v4.Y, amt),
            MathHelper.CatmullRom(v1.Z, v2.Z, v3.Z, v4.Z, amt));
    }

    // 辅助方法,将输入的"value"参数在[0, max]范围内循环
    int wrap(int value, int max)
    {
        while (value > max)
            value -= max;

        while (value < 0)
            value += max;

        return value;
    }
}与上一篇文章的SimpleAnimationClip类相比,新的东西是使用CatmullRom实现了曲线插值,代码看起来有点复杂,但在5.16 在3D空间中使用Catmull-Rom插值生成额外的顶点中已经详细解释了实现的原理,我就不再赘述了。此外,§12.3赛道也简单介绍了曲线的生成方法。
在构造函数中我们还对传递进来的关键帧集合按照时间先后顺序进行了重新排序,这是因为用户在添加关键帧时有可能不会按照时间发生顺序,如果没有重新排序,动画不产生错误的结果。你可以试着注释掉这行代码,并且打乱关键帧的顺序,看看动画会出现怎样的错误。
在XNA程序中的使用
有了新的类,我们就可以较方便的实现较复杂的动画了。你需要在XNA程序中添加AnimationClip变量:
AnimationClip animation;
然后在Initialize()方法中进行初始化:
protected override void Initialize()
{
    […]

    List<Keyframe> keyframes = new List<Keyframe>();

    // 以下这组关键帧适用于观察线性插值,让模型沿网格四条边移动
    keyframes.Add(new Keyframe(new Vector3(-16, 0,-16), new Vector3(0, MathHelper.ToRadians(-90),0),Vector3 .One ,TimeSpan.FromSeconds(0)));
    keyframes.Add(new Keyframe(new Vector3(16, 0, -16),new Vector3(0, MathHelper.ToRadians(-90), 0),Vector3 .One ,TimeSpan.FromSeconds(3)));
    keyframes.Add(new Keyframe(new Vector3(16, 0, -16),new Vector3(0, MathHelper.ToRadians(-180), 0),Vector3 .One , TimeSpan.FromSeconds(6)));
    keyframes.Add(new Keyframe(new Vector3(16, 0, 16), new Vector3(0, MathHelper.ToRadians(-180), 0), Vector3 .One ,TimeSpan.FromSeconds(9)));
    keyframes.Add(new Keyframe(new Vector3(16, 0, 16), new Vector3(0, MathHelper.ToRadians(-270), 0),Vector3 .One , TimeSpan.FromSeconds(12)));
    keyframes.Add(new Keyframe(new Vector3(-16, 0, 16),new Vector3(0, MathHelper.ToRadians(-270), 0),Vector3 .One , TimeSpan.FromSeconds(15)));
    keyframes.Add(new Keyframe(new Vector3(-16, 0, 16),new Vector3(0, MathHelper.ToRadians(-360), 0), Vector3 .One ,TimeSpan.FromSeconds(18)));
    keyframes.Add(new Keyframe(new Vector3(-16, 0, -16), new Vector3(0, MathHelper.ToRadians(-360), 0),Vector3 .One , TimeSpan.FromSeconds(21)));
    keyframes.Add(new Keyframe(new Vector3(-16, 0, -16), new Vector3(0, MathHelper.ToRadians(-450), 0),Vector3 .One , TimeSpan.FromSeconds(24)));

    // 以下这组关键帧适用于观察曲线插值,你可以注释掉上一组关键帧使用这组关键帧观看曲线运动
    // 别忘了将插值模式修改为LerpMode.Curve
    /*keyframes.Add(new Keyframe(new Vector3(-8, 0, 16),new Vector3(0, MathHelper.ToRadians(0), 0),         Vector3.One,TimeSpan.FromSeconds(0)));
    keyframes.Add(new Keyframe(new Vector3(8, 0, 16),new Vector3(0, MathHelper.ToRadians(0), 0),           Vector3.One,TimeSpan.FromSeconds(3)));
    keyframes.Add(new Keyframe(new Vector3(-8, 0, 0), new Vector3(0, MathHelper.ToRadians(0), 0),             Vector3.One,TimeSpan.FromSeconds(6)));
    keyframes.Add(new Keyframe(new Vector3(8,0, -8), new Vector3(0, MathHelper.ToRadians(0), 0),             Vector3.One,TimeSpan.FromSeconds(9)));
    keyframes.Add(new Keyframe(new Vector3(-8, 0, -16), new Vector3(0, MathHelper.ToRadians(180),             0),Vector3.One,TimeSpan.FromSeconds(12)));
    keyframes.Add(new Keyframe(new Vector3(-8, 0, 16), new Vector3(0, MathHelper.ToRadians(180),             0),Vector3.One,TimeSpan.FromSeconds(15)));
    keyframes.Add(new Keyframe(new Vector3(-8, 0, 16), new Vector3(0, MathHelper.ToRadians(360), 0),             Vector3.One,TimeSpan.FromSeconds(18)));*/

    animation = new AnimationClip(keyframes);
    //animation.Loop = true;
    //animation.LerpMode = LerpMode.Curve;

    base.Initialize();
}
最后在Update方法中更新动画数据并施加动画:
protected override void Update(GameTime gameTime)
{
    […]

    animation.Update(gameTime .ElapsedGameTime );

    model.Bones["Body"].Transform = animation.Transform * originalBodyTransform;
    //model.Bones["Head"].Transform = animation.Transform * originalHeadTransform;
    // 在使用HierarchicalMan时,下面这行注释的代码效果与上一行代码相同,
    // 通过索引访问会比通过Bone名称访问稍微快一些
    //model.Bones[2].Transform = animation.Transform * originalHeadTransform;

    base.Update(gameTime);
}
程序截图如下:
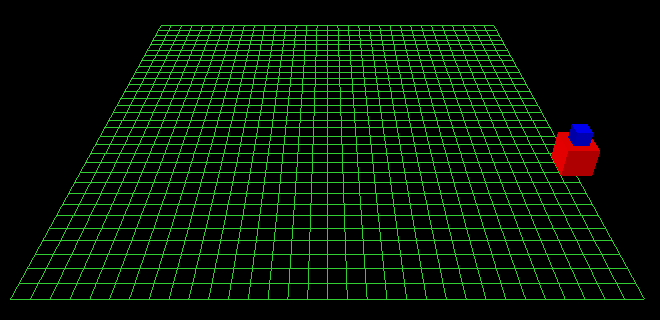
其中一组数据实现了模型沿网格四条边移动,另一组数据实现了类似正弦曲线的移动,你还可以改变动画类的Loop和LerpMode属性观察动画有什么不同。
我们发现设置不同时刻的关键帧是一个繁琐的工作,而且动画数据也不能重用,我们自然会想到将动画数据也封装成一个文件,用的时候只需加载这个文件就可以重现这个动画了。这个思路与flash CS3之后的版本中的Motion XML是一样的,即把补间动画的数据保存为一个xml文件,然后加载这个xml文件就可以重现补间动画了。我们将在下一篇文章中讨论具体的做法。
文件下载(已下载 1117 次)发布时间:2011/8/31 15:44:21 阅读次数:7788