28.天空盒SkyBoxSceneNode类
以上代码完全参考自2.8 天空盒,用的是文章中的第二种方法,即使用一张立方贴图实现天空盒,代码如下:
namespace StunEngine.SceneNodes
{
///
/// 天空盒
///
public class SkyBoxSceneNode:Renderable3DSceneNode
{
#region 构造函数和成员变量
///
/// 天空盒使用的材质
///
private SkyBoxMaterial material;
///
/// 创建一个天空盒,需指定天空盒使用的TextureCube的名称
///
/// 引擎
/// 所属场景
/// 天空盒纹理名称
public SkyBoxSceneNode(StunXnaGE engine,Scene setScene,string setSkyboxTextureName) : base(engine,setScene)
{
material = new SkyBoxMaterial(engine, engine.Content.Load("Effects\\SkyBox"));
material.CubeTextureName = setSkyboxTextureName;
// 实现IMaterial接口
Imaterial = (IMaterial)material;
//不对天空盒进行剔除操作
this.DisableCulling = true;
this.DisableUpdateCulling = true;
}
#endregion
///
/// 获取天空盒使用的材质
///
public SkyBoxMaterial Material
{
get { return material;}
}
///
/// 初始化天空盒,创建天空盒顶点缓冲。
///
public override void Initialize()
{
base.Initialize();
this.UpdateOrder = SceneNodeOrdering.EnvironmentMap.GetValue();
//创建天空盒顶点数据
this.mesh = MeshBuilder.CreateSkybox(engine.GraphicsDevice);
}
///
/// 绘制天空盒。
///
///
///
/// 测试SkyBoxSceneNode类
///
public static void TestSkyBoxSceneNode()
{
SkyBoxSceneNode skybox = null;
TestGame.Start("测试SkyBoxSceneNode类",
delegate
{
//添加一个天空盒
skybox = new SkyBoxSceneNode(TestGame.engine, TestGame.scene, "Textures/SkyCubeMap");
TestGame.scene.AddNode(skybox);
TestGame.scene.IsShowMouse = false;
},
delegate
{
//按空格键切换一张天空盒纹理
if (Input.KeyboardSpaceJustPressed)
{
if (skybox.Material.CubeTextureName == "Textures/SkyCubeMap")
skybox.Material.CubeTextureName = "Textures/LobbyCube";
else
skybox.Material.CubeTextureName = "Textures/SkyCubeMap";
}
});
}
#endif
#endregion
}
}
因为SkyBoxSceneNode类使用的材质不是GenericMaterial而是SkyBoxMaterial,所以它是从Renderable3DsceneNode类继承的。
使用的effect文件也是另外的SkyBox.fx,代码如下:
shared uniform extern float4x4	gProjection : PROJECTION;   //共享的投影矩阵
															//世界矩阵
uniform extern float4x4 gWorld: WORLD;						//视矩阵
uniform extern float4x4 gView: VIEW;

uniform extern float3	gCameraPos;	//	相机位置

// 天空盒使用的立方贴图
uniform extern texture gCubeTexture;

sampler CubeTextureSampler = sampler_state
{
	texture = ;
	magfilter = LINEAR;
	minfilter = LINEAR;
	mipfilter=LINEAR;
	AddressU = clamp;
    AddressV = clamp;
};

// 天空盒使用的顶点着色器输出结构
struct SkyBoxVSOut
{
    float4 Position   	: POSITION0;
    float3 Pos3D		: TEXCOORD0;
};

SkyBoxVSOut SkyBoxVS( float4 inPos : POSITION0)
{
	SkyBoxVSOut Output = (SkyBoxVSOut)0;
	//根据相机位置平移世界矩阵
	gWorld[3]=float4(gCameraPos,1.0f);

	// vertex shader只需每个顶点的位置,这个位置是由定义在XNA代码中的顶点提供的。
	// 将这个位置乘以世界矩阵、观察矩阵和投影矩阵的组合就可以获得2D屏幕坐标。
	// 顶点的原始位置在Output.Pos3D中被传递到pixel shader,在texCUBE中需要这个原始位置。
	// 因为需要获取从立方体中心指向顶点的方向,这个方向等于“顶点位置减去中心位置”。
	// 根据定义立方体顶点的方式,在原始空间(又叫做模型空间)中中心位置是(0,0,0),所以这个方向就是顶点的位置。
	float4x4 preViewProjection = mul (gView, gProjection);
	float4x4 preWorldViewProjection = mul (gWorld, preViewProjection);

	Output.Position = mul(inPos, preWorldViewProjection);
	Output.Pos3D = inPos;

	return Output;
}

float4 SkyBoxPS(SkyBoxVSOut Input): COLOR0
{
	// texCUBE沿着从立方体中心指向3D位置的方向获取颜色,而不是通过2D纹理坐标获取颜色,接着texCUBE计算对应的纹理坐标。
	// 这样做有几个优点。因为相机总在立方体中心,这个方向就是像素的3D位置的所需颜色!
	// 而且,因为处理的是一个方向,所以无需进行缩放,例如方向(1,3,-2)和方向(10,30,-20)是相同的。
	return texCUBE(CubeTextureSampler, Input.Pos3D);
}

technique SkyBox
{
	pass Pass0
    {
    	VertexShader = compile vs_3_0 SkyBoxVS();
        PixelShader  = compile ps_3_0 SkyBoxPS();
    }
}
注意:你需要通过将天空盒移动到相机位置而使相机总保持处在天空盒中心,这样无论你如何移动相机,天空盒看起来总停在同样的位置,给人在无穷远处的感觉。在2.8 天空盒中这个步骤是在C#代码中实现的,位于Draw方法中:
skyboxEffect.Parameters["xWorld"].SetValue(Matrix.CreateTranslation(fpsCam.Position));
我将这个代码移动到了shader内部:
//根据相机位置平移世界矩阵
gWorld[3]=float4(gCameraPos,1.0f);
效果是相同的。
创建天空盒顶点数据的操作由MeshBuilder类中的静态方法CreateSkybox完成,代码如下:
// XNA Framework无法处理只包含位置信息的顶点,
// 你当然可以使用一个复杂结构,比如VertexPositionColor而将颜色数据保持为空值,但这样做仍会将颜色数据发送到显卡,会浪费带宽。
// 要使程序保持清晰,你可以创建最简单的顶点格式,只包含位置数据。VertexPosition结构定义了一个自定义的顶点格式,只包含一个Vector3存储位置信息。
public struct VertexPosition
{
public Vector3 Position;
public VertexPosition(Vector3 position)
{
this.Position = position;
}
public static readonly VertexElement[] VertexElements =
{
new VertexElement( 0, 0, VertexElementFormat.Vector3, VertexElementMethod.Default, VertexElementUsage.Position, 0 )
};
public static readonly int SizeInBytes = sizeof(float) * 3;
}
///
/// 创建天空盒顶点和索引
///
/// 图形设备
/// (vertices);
IndexBuffer skyboxIndexBuffer = new IndexBuffer(g, typeof(ushort), indices.Length, BufferUsage.None);
skyboxIndexBuffer.SetData(indices);
VertexDeclaration skyboxVertexDeclaration = new VertexDeclaration(g, VertexPosition.VertexElements);
//创建mesh,使用TriangleList绘制天空盒,共有8个顶点,绘制12个三角形
return new Mesh(PrimitiveType.TriangleList, skyboxVertexBuffer, skyboxVertexDeclaration, skyboxIndexBuffer, 8, 12);
}
你会发现创建天空盒的顶点数据的方法与立方体是类似的,不同之处在于:1.天空盒是在内部观察的,顶点的绕行顺序与立方体正好相反,否则会由于背面剔除导致不可见;2.天空盒无需光照,因此顶点也不需要包括法线数据,只需定义8个顶点就可以了,而不是立方体中的24个。
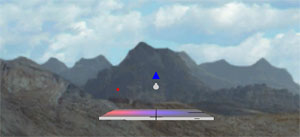
单元测试截图如下:

发布时间:2010/4/26 下午1:21:33 阅读次数:7816
