DirectX 10 教程15:FPS,CPU使用率和计时器
原文地址:Tutorial 15: FPS, CPU Usage, and Timers(http://www.rastertek.com/dx10tut15.html)。
源代码下载:dx10tut15.zip。
本教程将会介绍三个新类,它们封装了帧频率计数器,CPU使用率计数器和一个高精度的计时器。本教程的代码基于教程12:字体引擎。
第一个新类是FpsClass。FpsClass记录程序运行时每秒的帧数。知道帧频可以让我们对程序的性能有一个直观的认识,它也是衡量显卡渲染速度的一个工业标准度量值。当我们实现了一个新功能时,可以通过帧频看出这个功能对程序速度的影响。如果这个新功能将帧速降低了一半,你就会立即意识到出了大问题。计算机标准的帧频为60fps,低于60fps就被认为性能下降,而低于30fps时能被人眼明显地感觉到。
第二个新类是CpuClass。这个类记录cpu使用率,这样我们就可以在屏幕上显示这个信息。知道cpu使用率就可以帮助我们调试代码的效率,它提供了一个简单而快速的方法衡量我们的代码或算法的优劣。
最后一个类是TimerClass。它是一个高精度的计时器。用于记时事件,确保所有组件能在一个通用的时间系统中同步。
框架
本教程中包含三个新类的框架如下图所示:

首先依次来看一下三个新类。
Fpsclass.h
FpsClass只是个包含时钟的计数器,它记录了一秒中内会绘制几帧,并进行持续更新。
////////////////////////////////////////////////////////////////////////////////
// Filename: fpsclass.h
////////////////////////////////////////////////////////////////////////////////
#ifndef _FPSCLASS_H_
#define _FPSCLASS_H_


/////////////
// LINKING //
/////////////
#pragma comment(lib, "winmm.lib")


//////////////
// INCLUDES //
//////////////
#include <windows.h>
#include <mmsystem.h>


////////////////////////////////////////////////////////////////////////////////
// Class name: FpsClass
////////////////////////////////////////////////////////////////////////////////
class FpsClass
{
public:
	FpsClass();
	FpsClass(const FpsClass&);
	~FpsClass();

	void Initialize();
	void Frame();
	int GetFps();

private:
	int m_fps, m_count;
	unsigned long m_startTime;
};

#endif
Fpsclass.cpp
///////////////////////////////////////////////////////////////////////////////
// Filename: fpsclass.cpp
///////////////////////////////////////////////////////////////////////////////
#include "fpsclass.h"


FpsClass::FpsClass()
{
}


FpsClass::FpsClass(const FpsClass& other)
{
}


FpsClass::~FpsClass()
{
}
Initialize方法将计数器设置为0并开启一个计时器。
void FpsClass::Initialize()
{
	m_fps = 0;
	m_count = 0;
	m_startTime = timeGetTime();
	return;
}
Frame方法在每一帧调用,这样能每一帧加1,如果时间已经流逝了1秒,则将帧数保存在m_fps变量中,然后重新将计数器归0并重新开启计时器。
void FpsClass::Frame()
{
	m_count++;

	if(timeGetTime() >= (m_startTime + 1000))
	{
		m_fps = m_count;
		m_count = 0;

		m_startTime = timeGetTime();
	}
}
GetFps返回上一秒中的帧频,这个方法会持续地被调用,这样在屏幕上就会显示最新的帧频。
int FpsClass::GetFps()
{
	return m_fps;
}
Cpuclass.h
CpuClass用来获取每秒内CPU的使用率。
///////////////////////////////////////////////////////////////////////////////
// Filename: cpuclass.h
///////////////////////////////////////////////////////////////////////////////
#ifndef _CPUCLASS_H_
#define _CPUCLASS_H_
我们使用pdh库获取cpu使用率。
/////////////
// LINKING //
/////////////
#pragma comment(lib, "pdh.lib")


//////////////
// INCLUDES //
//////////////
#include <pdh.h>


///////////////////////////////////////////////////////////////////////////////
// Class name: CpuClass
///////////////////////////////////////////////////////////////////////////////
class CpuClass
{
public:
	CpuClass();
	CpuClass(const CpuClass&);
	~CpuClass();

	void Initialize();
	void Shutdown();
	void Frame();
	int GetCpuPercentage();

private:
	bool m_canReadCpu;
	HQUERY m_queryHandle;
	HCOUNTER m_counterHandle;
	unsigned long m_lastSampleTime;
	long m_cpuUsage;
};

#endif
Cpuclass.cpp
///////////////////////////////////////////////////////////////////////////////
// Filename: cpuclass.cpp
///////////////////////////////////////////////////////////////////////////////
#include "cpuclass.h"


CpuClass::CpuClass()
{
}


CpuClass::CpuClass(const CpuClass& other)
{
}


CpuClass::~CpuClass()
{
}
Initialize方法中创建一个句柄用于查询cpu使用率。这里创建的查询会组合所有cpu使用率并返回累加值。如果无法查询或碰到任何可能将m_canReadCpu标志设置为false的情况,则将cpu使用率设置为零,某些cpu和操作系统优先级会导致m_canReadCpu为false。我们还需开启一个计时器,这样才能使我们在一秒内只采样一次cpu使用率。
void CpuClass::Initialize()
{
	PDH_STATUS status;


	// Initialize the flag indicating whether this object can read the system cpu usage or not.
	m_canReadCpu = true;

	// Create a query object to poll cpu usage.
	status = PdhOpenQuery(NULL, 0, &m_queryHandle);
	if(status != ERROR_SUCCESS)
	{
		m_canReadCpu = false;
	}

	// Set query object to poll all cpus in the system.
	status = PdhAddCounter(m_queryHandle, TEXT("\\Processor(_Total)\\% processor time"), 0, &m_counterHandle);
	if(status != ERROR_SUCCESS)
	{
		m_canReadCpu = false;
	}

	m_lastSampleTime = GetTickCount();

	m_cpuUsage = 0;

	return;
}
Shutdown方法释放对cpu使用率的查询。
void CpuClass::Shutdown()
{
	if(m_canReadCpu)
	{
		PdhCloseQuery(m_queryHandle);
	}

	return;
}
和FpsClass一样,我们在每一帧调用Frame方法。但为了减少查询次数,我们使用了一个m_lastSampleTime变量让我们每秒只进行一次查询,这样每秒我们查询一次cpu使用率并将结果保存在m_cpuUsage中。
void CpuClass::Frame()
{
	PDH_FMT_COUNTERVALUE value;

	if(m_canReadCpu)
	{
		if((m_lastSampleTime + 1000) < GetTickCount())
		{
			m_lastSampleTime = GetTickCount();

			PdhCollectQueryData(m_queryHandle);

			PdhGetFormattedCounterValue(m_counterHandle, PDH_FMT_LONG, NULL, &value);

			m_cpuUsage = value.longValue;
		}
	}

	return;
}
GetCpuPercentage方法返回当前cpu使用率的值,如果无法读取这个值则设置为零。
int CpuClass::GetCpuPercentage()
{
	int usage;

	if(m_canReadCpu)
	{
		usage = (int)m_cpuUsage;
	}
	else
	{
		usage = 0;
	}

	return usage;
}
Timerclass.h
TimerClass是一个高精度计数器,用于检测两帧间的精确时间。最主要的用途就是确保那些需要标准帧移动的对象具有同时性。本教程中我们没有展示这个用途,我只是在代码中展示了如何将这个计时器施加到项目中。TimerClass最常用的功能就是计算当前帧持续了百分之多少,然后根据这个百分率移动物体。
////////////////////////////////////////////////////////////////////////////////
// Filename: timerclass.h
////////////////////////////////////////////////////////////////////////////////
#ifndef _TIMERCLASS_H_
#define _TIMERCLASS_H_


//////////////
// INCLUDES //
//////////////
#include <windows.h>


////////////////////////////////////////////////////////////////////////////////
// Class name: TimerClass
////////////////////////////////////////////////////////////////////////////////
class TimerClass
{
public:
	TimerClass();
	TimerClass(const TimerClass&);
	~TimerClass();

	bool Initialize();
	void Frame();

	float GetTime();

private:
	INT64 m_frequency;
	float m_ticksPerMs;
	INT64 m_startTime;
	float m_frameTime;
};

#endif
Timerclass.cpp
///////////////////////////////////////////////////////////////////////////////
// Filename: timerclass.cpp
///////////////////////////////////////////////////////////////////////////////
#include "timerclass.h"


TimerClass::TimerClass()
{
}


TimerClass::TimerClass(const TimerClass& other)
{
}


TimerClass::~TimerClass()
{
}
Initialize方法首先查询系统是否支持高频率计时器,如果返回一个频率值,则我们就用这个值确定每毫秒计数次数、我们可以使用这个值计算每帧的时间。在Initialize方法最后我们还要查询此帧的开始时刻用于开启计时。
bool TimerClass::Initialize()
{
	// Check to see if this system supports high performance timers.
	QueryPerformanceFrequency((LARGE_INTEGER*)&m_frequency);
	if(m_frequency == 0)
	{
		return false;
	}

	// Find out how many times the frequency counter ticks every millisecond.
	m_ticksPerMs = (float)(m_frequency / 1000);

	QueryPerformanceCounter((LARGE_INTEGER*)&m_startTime);

	return true;
}
Frame方法每帧都要被调用,这样我们就可以计算每次循环时时间的不同,进一步确定一帧所需的时间,我们将这个时间储存在m_frameTime变量中,它可以被任何需要同步的对象调用。然后将当前时间作为下一帧的开始时间。
void TimerClass::Frame()
{
	INT64 currentTime;
	float timeDifference;


	QueryPerformanceCounter((LARGE_INTEGER*)¤tTime);

	timeDifference = (float)(currentTime - m_startTime);

	m_frameTime = timeDifference / m_ticksPerMs;

	m_startTime = currentTime;

	return;
}
GetTime返回当前计算得出的帧时间。
float TimerClass::GetTime()
{
	return m_frameTime;
}
Systemclass.h
下面看一下三个新类如何整合到框架中。它们都放置在SystemClass中。
////////////////////////////////////////////////////////////////////////////////
// Filename: systemclass.h
////////////////////////////////////////////////////////////////////////////////
#ifndef _SYSTEMCLASS_H_
#define _SYSTEMCLASS_H_


///////////////////////////////
// PRE-PROCESSING DIRECTIVES //
///////////////////////////////
#define WIN32_LEAN_AND_MEAN


//////////////
// INCLUDES //
//////////////
#include <windows.h>


///////////////////////
// MY CLASS INCLUDES //
///////////////////////
#include "inputclass.h"
#include "graphicsclass.h"
我们包含了三个新类。
#include "fpsclass.h"
#include "cpuclass.h"
#include "timerclass.h"


////////////////////////////////////////////////////////////////////////////////
// Class name: SystemClass
////////////////////////////////////////////////////////////////////////////////
class SystemClass
{
public:
	SystemClass();
	SystemClass(const SystemClass&);
	~SystemClass();

	bool Initialize();
	void Shutdown();
	void Run();

	LRESULT CALLBACK MessageHandler(HWND, UINT, WPARAM, LPARAM);

private:
	bool Frame();
	void InitializeWindows(int&, int&);
	void ShutdownWindows();

private:
	LPCWSTR m_applicationName;
	HINSTANCE m_hinstance;
	HWND m_hwnd;

	InputClass* m_Input;
	GraphicsClass* m_Graphics;
创建了对应这三个新类的对象。
	FpsClass* m_Fps;
	CpuClass* m_Cpu;
	TimerClass* m_Timer;
};


/////////////////////////
// FUNCTION PROTOTYPES //
/////////////////////////
static LRESULT CALLBACK WndProc(HWND, UINT, WPARAM, LPARAM);


/////////////
// GLOBALS //
/////////////
static SystemClass* ApplicationHandle = 0;


#endif
Systemclass.cpp
下面的代码只列出与上一个教程不同的地方。
////////////////////////////////////////////////////////////////////////////////
// Filename: systemclass.cpp
////////////////////////////////////////////////////////////////////////////////
#include "systemclass.h"


SystemClass::SystemClass()
{
	m_Input = 0;
	m_Graphics = 0;
在类构造函数中将新对象初始化为null。
	m_Fps = 0;
	m_Cpu = 0;
	m_Timer = 0;
}


SystemClass::SystemClass(const SystemClass& other)
{
}


SystemClass::~SystemClass()
{
}


bool SystemClass::Initialize()
{
	int screenWidth, screenHeight;
	bool result;


	// Initialize the width and height of the screen to zero before sending the variables into the function.
	screenWidth = 0;
	screenHeight = 0;

	// Initialize the windows api.
	InitializeWindows(screenWidth, screenHeight);

	// Create the input object.  This object will be used to handle reading the keyboard input from the user.
	m_Input = new InputClass;
	if(!m_Input)
	{
		return false;
	}

	// Initialize the input object.
	result = m_Input->Initialize(m_hinstance, m_hwnd, screenWidth, screenHeight);
	if(!result)
	{
		MessageBox(m_hwnd, L"Could not initialize the input object.", L"Error", MB_OK);
		return false;
	}

	// Create the graphics object.  This object will handle rendering all the graphics for this application.
	m_Graphics = new GraphicsClass;
	if(!m_Graphics)
	{
		return false;
	}

	// Initialize the graphics object.
	result = m_Graphics->Initialize(screenWidth, screenHeight, m_hwnd);
	if(!result)
	{
		return false;
	}
创建并初始化FpsClass。
	// Create the fps object.
	m_Fps = new FpsClass;
	if(!m_Fps)
	{
		return false;
	}

	// Initialize the fps object.
	m_Fps->Initialize();
创建并初始化CpuClass。
	// Create the cpu object.
	m_Cpu = new CpuClass;
	if(!m_Cpu)
	{
		return false;
	}

	// Initialize the cpu object.
	m_Cpu->Initialize();
创建并初始化TimerClass。
	// Create the timer object.
	m_Timer = new TimerClass;
	if(!m_Timer)
	{
		return false;
	}

	// Initialize the timer object.
	result = m_Timer->Initialize();
	if(!result)
	{
		MessageBox(m_hwnd, L"Could not initialize the Timer object.", L"Error", MB_OK);
		return false;
	}

	return true;
}


void SystemClass::Shutdown()
{
在Shutdown方法中释放三个新类对象。
	// Release the timer object.
	if(m_Timer)
	{
		delete m_Timer;
		m_Timer = 0;
	}

	// Release the cpu object.
	if(m_Cpu)
	{
		m_Cpu->Shutdown();
		delete m_Cpu;
		m_Cpu = 0;
	}

	// Release the fps object.
	if(m_Fps)
	{
		delete m_Fps;
		m_Fps = 0;
	}

	// Release the graphics object.
	if(m_Graphics)
	{
		m_Graphics->Shutdown();
		delete m_Graphics;
		m_Graphics = 0;
	}

	// Release the input object.
	if(m_Input)
	{
		m_Input->Shutdown();
		delete m_Input;
		m_Input = 0;
	}

	// Shutdown the window.
	ShutdownWindows();

	return;
}
最后的变化在Frame方法中。每个新类都需要调用各自的Frame方法,之后我们就可以获取更新后的数据并将它们发送到GraphicsClass中。
bool SystemClass::Frame()
{
	bool result;


	// Update the system stats.
	m_Timer->Frame();
	m_Fps->Frame();
	m_Cpu->Frame();

	// Do the input frame processing.
	result = m_Input->Frame();
	if(!result)
	{
		return false;
	}

	// Do the frame processing for the graphics object.
	result = m_Graphics->Frame(m_Fps->GetFps(), m_Cpu->GetCpuPercentage(), m_Timer->GetTime());
	if(!result)
	{
		return false;
	}

	// Finally render the graphics to the screen.
	result = m_Graphics->Render();
	if(!result)
	{
		return false;
	}

	return true;
}
Graphicsclass.h
////////////////////////////////////////////////////////////////////////////////
// Filename: graphicsclass.h
////////////////////////////////////////////////////////////////////////////////
#ifndef _GRAPHICSCLASS_H_
#define _GRAPHICSCLASS_H_


/////////////
// GLOBALS //
/////////////
const bool FULL_SCREEN = true;
我们将垂直同步设置为false使程序能以尽可能快的速度运行。
const bool VSYNC_ENABLED = false;
const float SCREEN_DEPTH = 1000.0f;
const float SCREEN_NEAR = 0.1f;


///////////////////////
// MY CLASS INCLUDES //
///////////////////////
#include "d3dclass.h"
#include "cameraclass.h"
#include "textclass.h"


////////////////////////////////////////////////////////////////////////////////
// Class name: GraphicsClass
////////////////////////////////////////////////////////////////////////////////
class GraphicsClass
{
public:
	GraphicsClass();
	GraphicsClass(const GraphicsClass&);
	~GraphicsClass();

	bool Initialize(int, int, HWND);
	void Shutdown();
	bool Frame(int, int, float);
	bool Render();

private:
	D3DClass* m_D3D;
	CameraClass* m_Camera;
	TextClass* m_Text;
};

#endif
Graphicsclass.cpp
下面的代码只列出与上一个教程不同的部分。
////////////////////////////////////////////////////////////////////////////////
// Filename: graphicsclass.cpp
////////////////////////////////////////////////////////////////////////////////
#include "graphicsclass.h"
Frame方法的参数变为fps,cpu和timer。Fps和cpu在TextClass中进行设置并绘制在屏幕上。
bool GraphicsClass::Frame(int fps, int cpu, float frameTime)
{
	bool result;


	// Set the frames per second.
	result = m_Text->SetFps(fps);
	if(!result)
	{
		return false;
	}

	// Set the cpu usage.
	result = m_Text->SetCpu(cpu);
	if(!result)
	{
		return false;
	}

	// Set the position of the camera.
	m_Camera->SetPosition(0.0f, 0.0f, -10.0f);

	return true;
}
Textclass.h
////////////////////////////////////////////////////////////////////////////////
// Filename: textclass.h
////////////////////////////////////////////////////////////////////////////////
#ifndef _TEXTCLASS_H_
#define _TEXTCLASS_H_


///////////////////////
// MY CLASS INCLUDES //
///////////////////////
#include "fontclass.h"
#include "fontshaderclass.h"


////////////////////////////////////////////////////////////////////////////////
// Class name: TextClass
////////////////////////////////////////////////////////////////////////////////
class TextClass
{
private:
	struct SentenceType
	{
		ID3D10Buffer *vertexBuffer, *indexBuffer;
		int vertexCount, indexCount, maxLength;
		float red, green, blue;
	};

	struct VertexType
	{
		D3DXVECTOR3 position;
	    D3DXVECTOR2 texture;
	};

public:
	TextClass();
	TextClass(const TextClass&);
	~TextClass();

	bool Initialize(ID3D10Device*, HWND, int, int, D3DXMATRIX);
	void Shutdown();
	void Render(ID3D10Device*, D3DXMATRIX, D3DXMATRIX);
添加了两个新方法用于设置fps和cpu使用率。
	bool SetFps(int);
	bool SetCpu(int);

private:
	bool InitializeSentence(SentenceType**, int, ID3D10Device*);
	bool UpdateSentence(SentenceType*, char*, int, int, float, float, float);
	void ReleaseSentence(SentenceType**);
	void RenderSentence(ID3D10Device*, SentenceType*, D3DXMATRIX, D3DXMATRIX);

private:
	FontClass* m_Font;
	FontShaderClass* m_FontShader;
	int m_screenWidth, m_screenHeight;
	D3DXMATRIX m_baseViewMatrix;
	SentenceType* m_sentence1;
	SentenceType* m_sentence2;
};

#endif
Textclass.cpp
下面的代码只包含与上一个教程不同的部分。
///////////////////////////////////////////////////////////////////////////////
// Filename: textclass.cpp
///////////////////////////////////////////////////////////////////////////////
#include "textclass.h"
SetFps方法的参数为整数值的fps,然后将它转换为字符串,并在前面加上一个前缀表示这是fps速度,接着这个字符串存储在一个sentence结构体中用于绘制。如果fps大于60,SetFps方法还会将文字颜色设置为绿色,低于60 fps则为黄色,低于30 fps则为红色。
bool TextClass::SetFps(int fps)
{
	char tempString[16];
	char fpsString[16];
	float red, green, blue;
	bool result;


	// Truncate the fps to below 10,000.
	if(fps > 9999)
	{
		fps = 9999;
	}

	// Convert the fps integer to string format.
	_itoa_s(fps, tempString, 10);

	// Setup the fps string.
	strcpy_s(fpsString, "Fps: ");
	strcat_s(fpsString, tempString);

	// If fps is 60 or above set the fps color to green.
	if(fps >= 60)
	{
		red = 0.0f;
		green = 1.0f;
		blue = 0.0f;
	}

	// If fps is below 60 set the fps color to yellow.
	if(fps < 60)
	{
		red = 1.0f;
		green = 1.0f;
		blue = 0.0f;
	}

	// If fps is below 30 set the fps color to red.
	if(fps < 30)
	{
		red = 1.0f;
		green = 0.0f;
		blue = 0.0f;
	}

	// Update the sentence vertex buffer with the new string information.
	result = UpdateSentence(m_sentence1, fpsString, 20, 20, red, green, blue);
	if(!result)
	{
		return false;
	}

	return true;
}
SetCpu方法与SetFps类似,将参数cpu转换为一个字符串,储存在一个sentence结构体中并进行绘制。
bool TextClass::SetCpu(int cpu)
{
	char tempString[16];
	char cpuString[16];
	bool result;


	// Convert the cpu integer to string format.
	_itoa_s(cpu, tempString, 10);

	// Setup the cpu string.
	strcpy_s(cpuString, "Cpu: ");
	strcat_s(cpuString, tempString);
	strcat_s(cpuString, "%");

	// Update the sentence vertex buffer with the new string information.
	result = UpdateSentence(m_sentence2, cpuString, 20, 40, 0.0f, 1.0f, 0.0f);
	if(!result)
	{
		return false;
	}

	return true;
}
总结
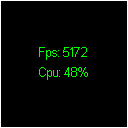
现在我们就可以在屏幕上显示FPS和CPU使用率,而且我们还拥有了一个高精度的计时器使对象的平移和旋转不受程序帧频的影响。
练习
1.编译代码在屏幕上正确显示fps和cpu使用率,按escape键退出。
2.打开graphicsclass.h中的vsync,观察显卡/显示器的刷新速度被锁定。
文件下载(已下载 929 次)发布时间:2012/7/30 0:10:34 阅读次数:11778