Silverlight Toolkit (December 2011)的新功能
原文地址:Silverlight Toolkit (December 2011) for Silverlight 5–What’s new?(http://blogs.msdn.com/b/eternalcoding/archive/2011/12/10/silverlight-toolkit-september-2011-for-silverlight-5-what-s-new.aspx?PageIndex=4)。
用于Silverlight 5的新版本Silverlight Toolkit (December 2011) 已经发布,你可以在http://silverlight.codeplex.com/releases/view/78435下载。
更新:Babylon Engine现在也使用了了Silverlight 5 Toolkit::http://code.msdn.microsoft.com/Babylon-3D-engine-f0404ace。
这篇文章帮助你发现这个Toolkit是如何通过下述功能增强Silverlight 5的:
- 使用Content Pipeline(素材管道)无缝整合3D模型和其他素材。
- 用于的新Visual Studio模板:
- a.创建Silverlight 3D应用程序
- b.Silverlight 3D类库
- c.Silverlight Effect
- 3.演示这些新功能的示例。
与Content Pipeline的无缝整合
这个新Toolkit带来了一个新组件:Microsoft.Xna.Framework.Content.dll。这个组件使你可以加载.xnb格式的素材(这些素材是由Content Pipeline创建的)。
使用新的Visual Studio模板(在后面会提到),你可以将已有的3D项目直接导入到Silverlight 5中!
Microsoft.Xna.Framework.Content.dll在Silverlight 5中添加了以下类:
- ContentManager
- Model
- SpriteFont和SpriteBatch
这个Toolkit还带来了Microsoft.Xna.Framework.Tookit.dll程序集,这个程序集在Silverlight 5中添加了以下类:
- SilverlightEffect
- Mouse, MouseState
- Keyboard,KeyboardState
ContentManager
这个类的文档地址为:
http://msdn.microsoft.com/en-us/library/microsoft.xna.framework.content.contentmanager.aspx。
ContentManager类代表代码中的Content Pipeline,它用来从.xnb文件加载对象。
要创建一个ContentManager执行调用以下代码:
ContentManager contentManager = new ContentManager(null, "Content");
这个类有一些限制:用于Silverlight的ContentManager只支持一个Content项目,RootDirectory必须设置为“Content”。
使用这个类很简单,因为它提供了一个简单的Load方法创建对象:
// 加载字体
hudFont = contentManager.Load<spritefont>("Fonts/Hud");
// 加载纹理
winOverlay = contentManager.Load<Texture2D>("Overlays/you_win");
// 加载音乐
backgroundMusic = contentManager.Load<SoundEffect>("Sounds/Music");
模型Model类
这个类的文档的地址为:
http://msdn.microsoft.com/en-us/library/microsoft.xna.framework.graphics.model.aspx。
Model类使用的API与在XNA 4中是一样的,通过这个类你可以从XNB文件加载并绘制3D模型:
// 绘制模型
Model tankModel = content.Load<Model>("tank");
tankModel.Draw();
如果模型支持bone也可以使用:
Model tankModel = content.Load<Model>("tank");
tankModel.Root.Transform = world;
tankModel.CopyAbsoluteBoneTransformsTo(boneTransforms);

// 绘制模型
foreach (ModelMesh mesh in tankModel.Meshes)
{
    foreach (BasicEffect effect in mesh.Effects)
    {
        effect.World = boneTransforms[mesh.ParentBone.Index];
        effect.View = view;
        effect.Projection = projection;
        effect.EnableDefaultLighting();
    }
    mesh.Draw();
}
你可以导入.x或.fbx格式的模型:
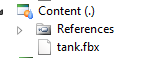
使用FBX导入器,你也可以导入.3ds, .obj, .dxf和Collada。
SpriteFont和SpriteBatch
这些类的文档的地址为:
http://msdn.microsoft.com/en-us/library/microsoft.xna.framework.graphics.spritebatch.aspx,
http://msdn.microsoft.com/en-us/library/microsoft.xna.framework.graphics.spritefont.aspx。
SpriteBatch类用来在顶层显示2D纹理,用来显示UI或Sprite。
SpriteBatch spriteBatch = new SpriteBatch(graphicsDevice);
spriteBatch.Begin(SpriteSortMode.Immediate,BlendState.Opaque);
spriteBatch.Draw(texture, new Rectangle(0, 0, width, height),Color.White);
spriteBatch.End();
从以上的代码可以看出SpriteBatch只需要指定一个纹理用于显示。
SpriteFont可以使用Sprite显示文字。
SpriteFont hudFont = contentManager.Load<SpriteFont>("Fonts/Hud");
spriteBatch.DrawString(hudFont, value, position + new Vector2(1.0f, 1.0f), Color.Black);
spriteBatch.DrawString(hudFont, value, position, color);
SpriteFont的绘制依赖于SpriteBatch,而且需要在ContentManager中定义一个font:
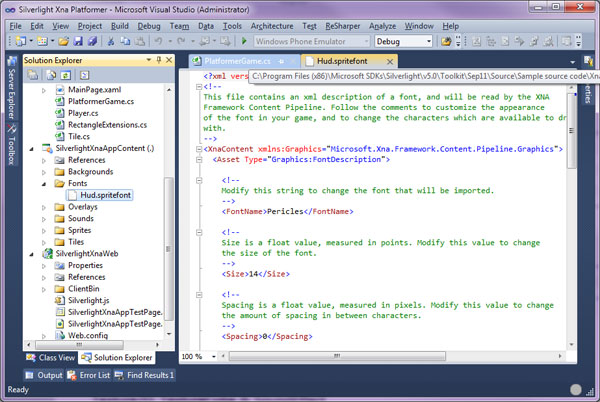
SilverlightEffect
Toolkit还提供了一个叫做SilverlightEffect的新类用于处理.fx文件。
它还支持扩展名为.slfx的shader文件,.slfx和.fx并没有区别,但是因为XNA Effect Processor已经关联了.fx文件,所以Silverlight Content Pipeline只能选择另一个扩展名了。
你可以在Content项目中定义一个完整的effect,使用这个effect绘制模型。
步骤为:
- 创建一个至少包含一个technique的.fx文件
- Shader入口点必须是无参数的
- 定义渲染状态
例如下面是一个简单的.fx文件:
float4x4 WorldViewProjection;
float4x4 World;
float3 LightPosition;

// 着色器输入输出结构
struct VS_INPUT
{
    float4 position : POSITION;
    float3 normal : NORMAL;
    float4 color : COLOR0;
};

struct VS_OUTPUT
{
    float4 position : POSITION;
    float3 normalWorld : TEXCOORD0;
    float3 positionWorld : TEXCOORD1;
    float4 color : COLOR0;
};

// 顶点着色器
VS_OUTPUT mainVS(VS_INPUT In)
{
    VS_OUTPUT Out = (VS_OUTPUT)0;

    // 坐标转换
    Out.position = mul(In.position, WorldViewProjection);

    // 计算世界空间中的法线
    Out.normalWorld = mul(In.normal,(float3x3)WorldViewProjection);

    // 计算世界空间中的位置
    Out.positionWorld = (mul(In.position, World)).xyz;

    // 直接传递顶点颜色 Out.color = In.color;

    return Out;
}

// 像素着色器
float4 mainPS(VS_OUTPUT In) : COLOR
{
    // 光照方程
    float3 lightDirectionW = normalize(LightPosition - In.positionWorld);
    float ndl = max(0, dot(In.normalWorld, lightDirectionW));

    // 最终颜色
    return float4(In.color.rgb * ndl, 1);
}

// Technique
technique MainTechnique
{
    pass P0
    {
        VertexShader = compile vs_2_0 mainVS(); // 必须无参数
        PixelShader = compile ps_2_0 mainPS(); // 必须无参数
    }
}
Toolkit会在Content Pipeline中添加所需的处理器,为这个effect创建.xnb文件:
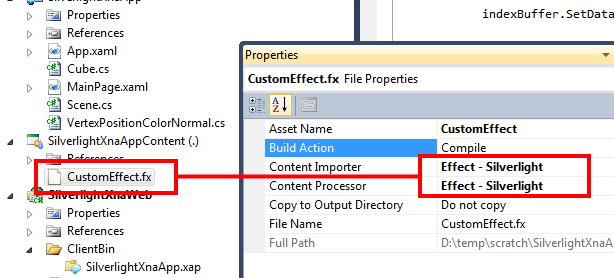
要使用这个effect,你必须在代码中实例化一个新SilverlightEffect对象:
mySilverlightEffect = scene.ContentManager.Load<Silverlighteffect>("CustomEffect");
然后你就可以访问effect的参数:
worldViewProjectionParameter = mySilverlightEffect.Parameters["WorldViewProjection"];
worldParameter = mySilverlightEffect.Parameters["World"];
lightPositionParameter = mySilverlightEffect.Parameters["LightPosition"];
使用effect绘制对象的代码与XNA4是一样的:
worldParameter.SetValue(Matrix.CreateTranslation(1, 1, 1));
ProjectionParameter.SetValue(WorldViewProjection);
lightPositionParameter.SetValue(LightPosition);

foreach (var pass in mySilverlightEffect.CurrentTechnique.Passes)
{
    // Apply
    pass pass.Apply();

    // 设置顶点缓冲和索引缓冲
    graphicsDevice.SetVertexBuffer(vertexBuffer);
    graphicsDevice.Indices = indexBuffer;

    // 绘制primitives
    graphicsDevice.DrawIndexedPrimitives(PrimitiveType.TriangleList,0, 0, VerticesCount, 0, FaceCount);
}
Texture2D, TextureCube和SoundEffect
Silverlight 5提供了Texture2D、TextureCube和SoundEffect类,使用Toolkit你可以从ContentManager加载这些类:
// 加载2D纹理
winOverlay = contentManager.Load<Texture2d>("Overlays/you_win");
// 音乐
backgroundMusic = contentManager.Load<SoundEffect>("Sounds/Music");
鼠标与键盘
为了更好地输出已经存在的3D项目,Toolkit中还添加了对Microsoft.Xna.Framework.Input命名空间的部分支持。
这样就可以在想要的任何地方调用MouseState和KeyboardState:
public MainPage()
{
    InitializeComponent();
    Mouse.RootControl = this;
    Keyboard.RootControl = this;
}
但是与原始的XNA有一点不同:你必须注册提供鼠标和键盘事件的根控件,MouseState位置是相对于这个控件的左上角位置的:
private void myDrawingSurface_Draw(object sender, DrawEventArgs e)
{
    // 绘制场景
    scene.Draw();

    // 刷新
    e.InvalidateSurface();

    // 获取鼠标和键盘状态
    MouseState mouseState = Mouse.GetState();
    KeyboardState keyboardState = Keyboard.GetState();

    ...
}
MouseState和KeyboardState类似于XNA中的版本:
http://msdn.microsoft.com/en-us/library/microsoft.xna.framework.input.mousestate.aspx,
http://msdn.microsoft.com/en-us/library/microsoft.xna.framework.input.keyboardstate.aspx。
扩展
Silverlight Content Pipeline可以使用与XNA Content相同的方式进行扩展。你可以提供自己的实现方式实现从其他地方加载素材,而默认情况是加载内嵌的.xnb文件。
例如,你可以写一个类从网络加载.xnb文件流,要实现以上功能,你必须从inherit继承,提供自己的OpenStream实现:
public class MyContentManager : ContentManager
{
    public MyContentManager() : base(null)
    { }

    protected override System.IO.Stream OpenStream(string assetName)
    {
        return base.OpenStream(assetName);
    }
}
你也可以编写自己的type reader,以下代码是用于SilverlightEffect的自定义type reader:
 /// <summary>
/// 读取SilverlightEffect.
/// </summary>
public class SilverlightEffectReader : ContentTypeReader<Silverlighteffect>
{
    /// <summary>
    /// 读取并创建一个SilverlightEffect
    /// </summary>
    protected override SilverlightEffect Read(ContentReader input, SilverlightEffect existingInstance)
    {
        int techniquesCount = input.ReadInt32();
        EffectTechnique[] techniques = new EffectTechnique[techniquesCount];

        for (int techniqueIndex = 0; techniqueIndex < techniquesCount; techniqueIndex++)
        {
            int passesCount = input.ReadInt32();
            EffectPass[] passes = new EffectPass[passesCount];

            for (int passIndex = 0; passIndex < passesCount;passIndex++)
            {
                string passName = input.ReadString();
                // 顶点着色器
                int vertexShaderByteCodeLength = input.ReadInt32();
                byte[] vertexShaderByteCode = input.ReadBytes(vertexShaderByteCodeLength);
                int vertexShaderParametersLength = input.ReadInt32();
                byte[] vertexShaderParameters = input.ReadBytes(vertexShaderParametersLength);

                // 像素着色器
                int pixelShaderByteCodeLength = input.ReadInt32();
                byte[] pixelShaderByteCode = input.ReadBytes(pixelShaderByteCodeLength);
                int pixelShaderParametersLength = input.ReadInt32();
                byte[] pixelShaderParameters = input.ReadBytes(pixelShaderParametersLength);

                MemoryStream vertexShaderCodeStream = new MemoryStream(vertexShaderByteCode);
                MemoryStream pixelShaderCodeStream = new MemoryStream(pixelShaderByteCode);
                MemoryStream vertexShaderParametersStream = new MemoryStream(vertexShaderParameters);
                MemoryStream pixelShaderParametersStream = new MemoryStream(pixelShaderParameters);

                // 实例化pass
                SilverlightEffectPass currentPass = new SilverlightEffectPass(passName, Manager.Current.GraphicsDevice,vertexShaderCodeStream, pixelShaderCodeStream, vertexShaderParametersStream, pixelShaderParametersStream);
                passes[passIndex] = currentPass;

                vertexShaderCodeStream.Dispose();
                pixelShaderCodeStream.Dispose();
                vertexShaderParametersStream.Dispose();
                pixelShaderParametersStream.Dispose();

                // 渲染状态
                int renderStatesCount = input.ReadInt32();
                for (int renderStateIndex = 0; renderStateIndex < renderStatesCount; renderStateIndex++)
                {
                    currentPass.AppendState(input.ReadString(),input.ReadString());
                }
            }

            // 实例化technique
            techniques[techniqueIndex] = new EffectTechnique(passes);
        }
        return new SilverlightEffect(techniques);
    }
}
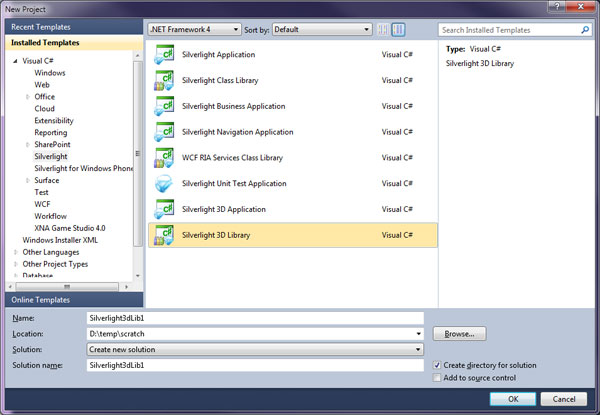
新的Visual Studio模板
Toolkit会安装两个新的项目模板和一个新item模板:
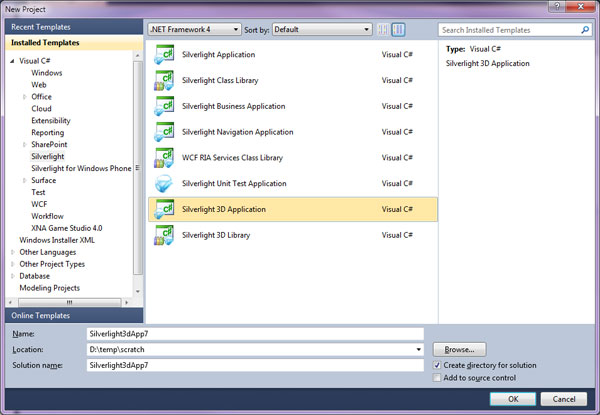
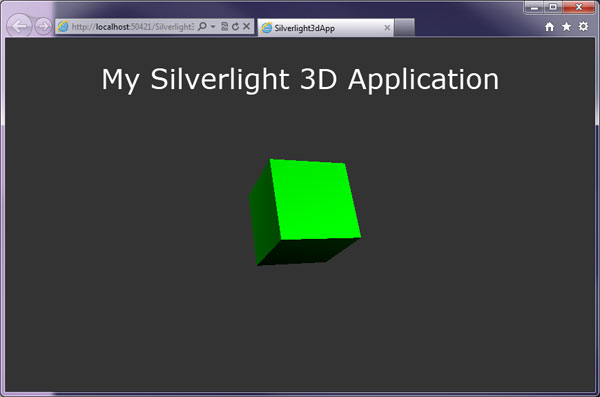
Silverlight3DApp
这个模板会创建一个完整的可工作的Silverlight 3D应用程序。
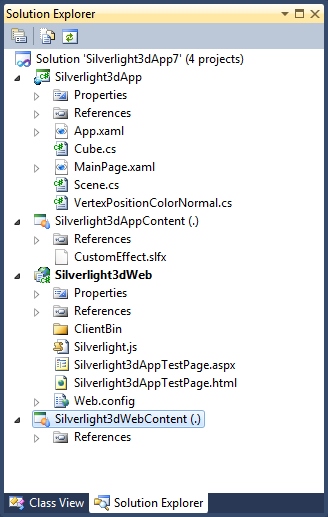
这个新解决方案由四个项目组成:
- Silverlight3Dapp:主项目
- Silverlight3DappContent:关联到主项目的content项目
- Silverlight3Dweb:显示主项目的网站
- Silverlight3DwebContent:关联到网站的content项目,当你想不使用内嵌的.xnb素材而是从网站读取.xnb文件流时需要用到这个项目,这样做可以让你发布一个较小的.xap文件。
主项目(Silverlight3Dapp)创建了两个对象:
- 一个scene对象用于
- 创建ContentManager
- 处理DrawingSurface的Draw事件
- 一个cube对象用于
- 创建一个顶点缓冲和索引缓冲
- 使用ContentManager从content项目读取SilverlightEffect(Customeffect.slfx)
- 配置并使用SilverlightEffect进行绘制
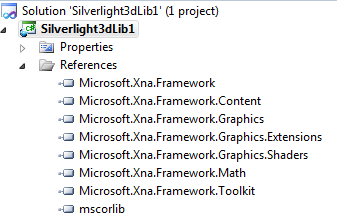
Silverlight3DLib
这个模板创建一个不包含content但包含Microsoft.Xna.Framework引用的Silverlight库:
项目的结构如下图所示:
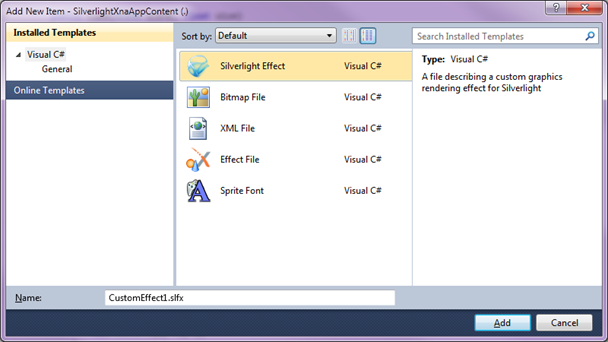
SilverlightEffect
这个item模板在Content项目中使用,它可以添加一个自定义的.slfx文件,与SilverlightEffect类协同工作:
文件的内容如下:
float4x4 World;
float4x4 View;
float4x4 Projection;

// TODO: add effect parameters here.
struct VertexShaderInput
{
    float4 Position : POSITION0;

    // TODO: add input channels such as texture
    // coordinates and vertex colors here.
};

struct VertexShaderOutput
{
    float4 Position : POSITION0;

    // TODO: add vertex shader outputs such as colors and texture
    // coordinates here. These values will automatically be interpolated
    // over the triangle, and provided as input to your pixel shader.
};

VertexShaderOutput VertexShaderFunction(VertexShaderInput input)
{
    VertexShaderOutput output;

    float4 worldPosition = mul(input.Position, World);
    float4 viewPosition = mul(worldPosition,View);
    output.Position = mul(viewPosition, Projection);

    // TODO: add your vertex shader code here.

    return output;
}

float4 PixelShaderFunction(VertexShaderOutput input) : COLOR0
{
    // TODO: add your pixel shader code here.
    return float4(1, 0, 0, 1);
}

technique Technique1
{
    pass Pass1
    {
        // TODO: set renderstates here.

        VertexShader = compile vs_2_0 VertexShaderFunction();
        PixelShader = compile ps_2_0 PixelShaderFunction();
    }
}
演示新功能的新示例
最后,为了帮你学习这些新功能,我们添加了一些很酷的示例:
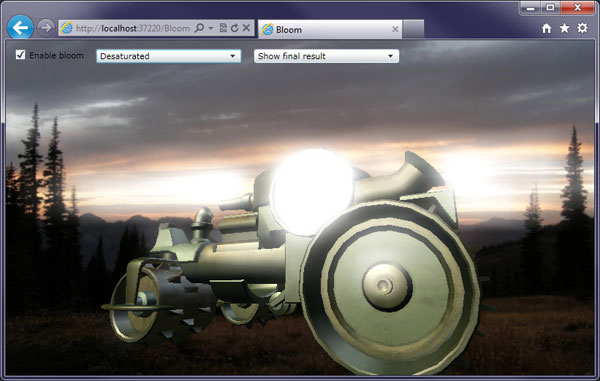
Bloom
这个示例介绍了如何使用sprite实现“bloom”后期处理效果,它还使用了Content Pipeline从一个.fbx文件导入了一个坦克模型。
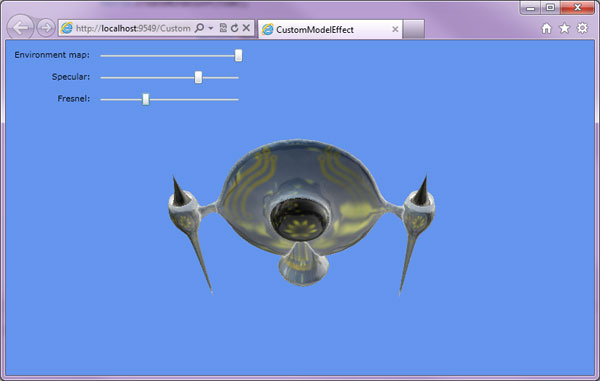
CustomModelEffect(自定义模型Effect)
这个示例介绍了如何使用Content Pipeline 在模型上施加自定义effect。
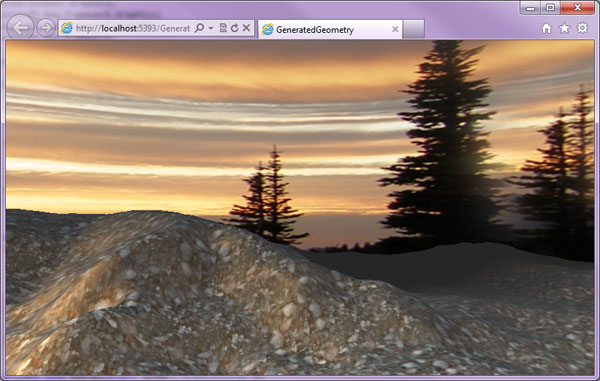
Generated geometry(生成几何体)
这个示例介绍了如何在Content Pipeline生成过程中使用代码创建3D模型。
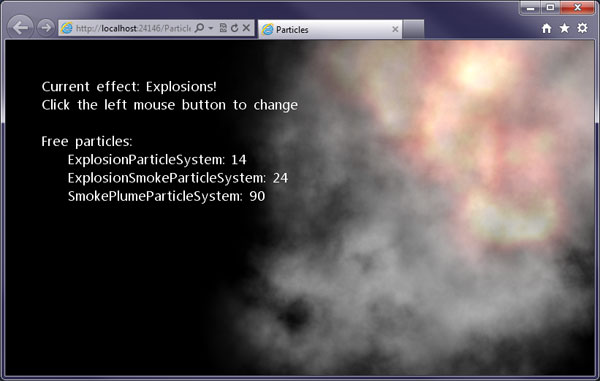
Particles(粒子)
这个示例介绍了粒子系统的概念,如何使用SpriteBatch绘制粒子效果。示例中有两个粒子效果:爆炸和烟雾:
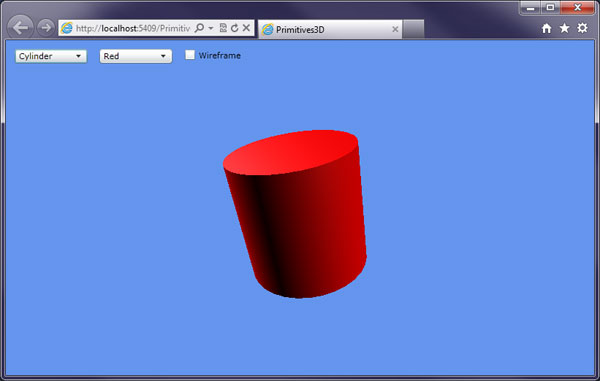
Primitives3D(3D图元)
这个例子介绍了如何重用代码绘制基本几何图元:
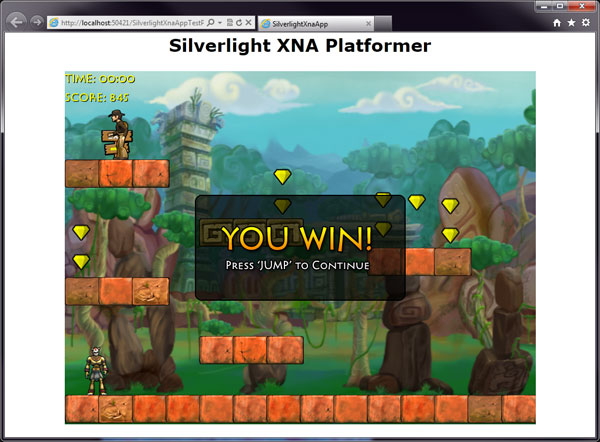
Platformer(平台游戏)
这个例子介绍了一个具有3个关卡的完整游戏(你也可以很容易地添加自己的关卡)。展示了在一个平台游戏中的SpriteBatch,SpriteFont和SoundEffect的用法,还使用了键盘类控制玩家。
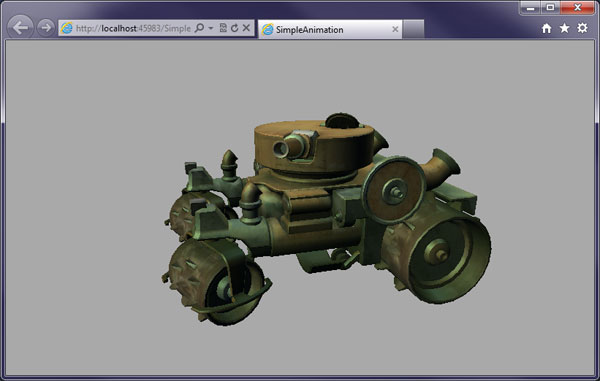
SimpleAnimation(简单动画)
这个示例介绍了如何在一个3D模型上实现刚体动画:
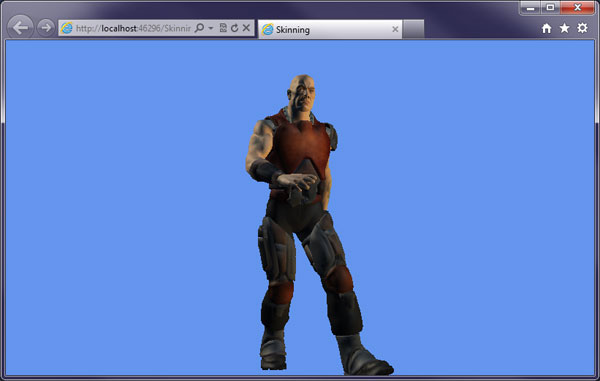
Skinning(蒙皮动画模型)
这个例子介绍了如何使用Content Pipeline处理并绘制一个蒙皮动画模型。
发布时间:2012/1/5 16:29:41 阅读次数:13072