2.在XNA中使用Stun2Dphysics
上一篇文章1.质点运动学和Stun2DPhysics引擎中我们已经创建了一个最简陋的2D物理引擎,只需设置Body的初速度和加速度,引擎就会自动计算出任意时刻的速度和位置,下面我们需要将这个引擎整合到XNA程序中。
将Stun2DPhysics整合到XNA程序中
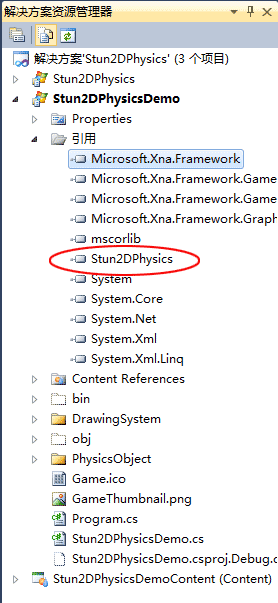
首先在上一篇文章中创建的Stun2Dphysics解决方案中新建一个名称为Stun2DPhysicsDemo的Windows Game(4.0)项目,确定后解决方案中会自动生成这个项目以及对应的Content项目,然后在Stun2DPhysicsDemo项目中添加对物理引擎Stun2Dphysics的引用,截图如下:
然后需要对Texture2D对象进行封装,附加引擎的Body对象,因此新建一个名为PhysicsObject的文件夹,在此文件夹中添加BoxObject.cs类,这个类可以生成一个具有物理属性的矩形,代码如下:
using Microsoft.Xna.Framework;
using Microsoft.Xna.Framework.Graphics;
using Stun2DPhysics.DrawingSystem;
using Stun2DPhysics.Dynamics;

namespace Stun2DPhysics.PhysicsObject
{
    ///
    /// 具有物理属性的矩形
    ///
    public class BoxObject
    {
        Texture2D texture;
        Vector2 origin;
        Vector2 position;
        int width;
        int height;

        public Body Body { get; private set; }

        ///
        /// 创建一个BoxObject
        ///
        /// 宽
        /// 高
        /// 位置
        public BoxObject(int setWidth, int setHeight, Vector2 setPosition)
        {
            width = setWidth;
            height = setHeight;
            position = setPosition;
        }

        ///
        /// 加载纹理并附加Body对象
        ///
        /// 图形设备
        /// 物理引擎
        public void Load(GraphicsDevice graphicsDevice, PhysicsSimulator physicsSimulator)
        {
            texture = DrawingHelper.CreateRectangleTexture(graphicsDevice, width, height, Color.White, Color.Black);
            origin = new Vector2(texture.Width / 2f, texture.Height / 2f);

            Body = new Body();
            Body.Position = position;
            physicsSimulator.Add(Body);
        }

        ///
        /// 绘制
        ///
        ///
        /// 调制颜色
        public void Draw(SpriteBatch spriteBatch, Color color)
        {
            spriteBatch.Draw(texture, Body.Position, null, color, 0f , origin, 1f, SpriteEffects.None, 0f);
        }
    }
}
在构造函数中设置矩形的宽、高和位置,然后在Load方法中创建纹理和附加Body,这个纹理的位置是由Body的Position属性决定的,而Body的Position属性是由物理引擎计算得出的。 BoxObject的纹理并不是由内容管理器加载的,而是在DrawingHelper类的CreateRectangleTexture方法中手动生成,DrawingHelper类的代码如下:
using Microsoft.Xna.Framework;
using Microsoft.Xna.Framework.Graphics;
namespace Stun2DPhysics.DrawingSystem
{
public static class DrawingHelper
{
///
/// 创建一个矩形纹理,无边框
///
/// 图形设备
/// 宽
/// 高
/// 填充颜色
///
/// 创建一个矩形纹理,边框宽度为1
///
/// 图形设备
/// 宽
/// 高
/// 填充颜色
/// 边框颜色
///
/// 创建一个矩形纹理
///
/// 图形设备
/// 宽
/// 高
/// 边框宽度
/// 填充颜色
/// 边框颜色
///
/// 创建一张矩形纹理
///
/// 图形设备
/// 宽
/// 高
/// 边框宽度
/// 边框内过渡宽度
/// 边框外过渡宽度
/// 填充颜色
/// 边框颜色
///
代码有点复杂,其实这个代码类似于flash中画出一个矢量矩形的过程,你需要设置边框颜色,格式以及内部填充颜色,如果你编程能力够强的画,也能实现flash中的渐变填充颜色的效果,类似的方法也可以实现椭圆,具体代码请参见FarseerPhysics2.1.3,为了简单起见,我并没有加入画椭圆的代码。
如果你并不想手动生成纹理,可以使用SpriteObject类,这个类直接传入Texture2D对象,原理与BoxObject是类似的,代码如下:
using Microsoft.Xna.Framework;
using Microsoft.Xna.Framework.Graphics;
using Stun2DPhysics.Dynamics;

namespace Stun2DPhysics.PhysicsObject
{
    ///
    /// 具有物理属性的Sprite
    ///
    public class SpriteObject
    {
        private Texture2D texture;
        private Vector2 origin;
        private Vector2 position;

        public Body Body { get; private set; }

        ///
        /// 创建一个SpriteObject
        ///
        /// 初始位置
        public SpriteObject(Vector2 setPosition)
        {
            position = setPosition;
        }

        ///
        /// 设置纹理并附加Body
        ///
        /// 纹理
        /// 物理引擎
        public void Load(Texture2D setTexture, PhysicsSimulator physicsSimulator)
        {
            texture = setTexture;
            origin = new Vector2(texture.Width / 2f, texture.Height / 2f);

            Body = new Body();
            Body.Position = position;
            physicsSimulator.Add(Body);
        }

        public void Draw(SpriteBatch spriteBatch, Color color)
        {
            spriteBatch.Draw(texture, Body.Position, null, color, 0f , origin, 1f, SpriteEffects.None, 0f);
        }
    }
}
步骤如下:
1. 你需要三个成员变量:引擎PhysicsSimulator,矩形物理对象BoxObject和直接使用Texture2D的物理对象SpriteObject。
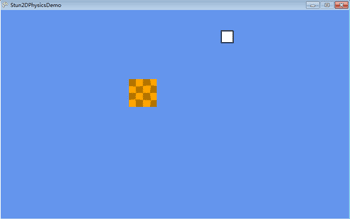
2. 在Initialize()中初始化引擎,在LoadContent()方法中调用物理对象的Load()方法,设置两个物理对象的初速度和加速度,我设置为一个水平向右,一个水平向左,而加速度竖直向下,物理知识告诉我们,这样这两个对象做平抛运动。
3. 在Update()方法中更新引擎,引擎会计算所有Body对象的位置。
4. 在Draw()方法中绘制物理对象。
程序截图如下:
将Stun2DPhysics整合到StunEngine中
在引擎项目StunEngine中的SceneNodes文件夹中添加Physics2DsceneNode文件夹,在此文件夹中添加名为Physics2DsceneNode的类,代码如下:
using Microsoft.Xna.Framework;
using Stun2DPhysics.Dynamics;
using StunEngine.SceneManagement;

namespace StunEngine.SceneNodes
{
    ///
    /// 具有物理属性的2D图像
    ///
    public class Physics2DSceneNode :Renderable2DSceneNode
    {
        ///
        /// 纹理源矩形
        ///
        protected Rectangle? rectSourceOrigin = null;

        ///
        /// 创建一个新Physics2DSceneNode对象
        ///
        /// 引擎
        /// 所属场景
        /// 纹理名称,带路径
        public Physics2DSceneNode(StunXnaGE engine, Scene setScene, string setTextureName)
            : base(engine, setScene, setTextureName)
        {
            if (Scene.PhysicsSimulator == null)
                throw new System.InvalidOperationException("物理系统还未初始化");

            Body = new Body();
            Scene.PhysicsSimulator.Add(Body);
            Origin = new Vector2(texture.Width / 2f, texture.Height / 2f);
        }

        public Body Body { get; private set; }

        ///
        /// 获取或设置控件的2D屏幕位置
        ///
        public override Vector2 Position
        {
            get { return position; }
            set
            {
                position = value;
                Body.Position = position;
                OnLocationChanged();
            }
        }

        public override int Draw(GameTime gameTime)
        {
            //获取图像淡入淡出的透明颜色
            alphaTextureColor = new Color(Color.R, Color.G, Color.B, Scene.TransitionAlpha);

            //绘制图像
            StunXnaGE.SpriteBatch.Draw(texture, new Rectangle((int)Body.Position.X, (int)Body.Position.Y, (int)size.X, (int)size.Y), rectSourceOrigin, alphaTextureColor, Rotation, Origin, SpriteEffect, LayerDepth);

            return 1;

        }
    }
}
Physics2DsceneNode从绘制2D图像的Renderable2DsceneNode类继承,新添了Body属性,由物理引擎的Body类负责更新它的位置。
然后在Scene类中添加以下代码:
public class Scene
{
    […]

    internal PhysicsSimulator PhysicsSimulator;

    internal Scene(StunXnaGE engine, ushort sceneId, string name, int aproximateNodes)
    {
        […]

        PhysicsSimulator = new PhysicsSimulator();
    }

    public virtual void Update(GameTime gameTime, bool otherScreenHasFocus, bool coveredByOtherScreen)
    {
        […]

        PhysicsSimulator.Update((float)gameTime.ElapsedGameTime .TotalSeconds);
    }
}
以上代码在Scene类中添加了PhysicsSimulator的成员变量,在Scene的构造函数中进行初始化,在Update方法中更新物理引擎。
要使用Physics2DsceneNode类,单元测试的示例代码如下:
box1 = new Physics2DSceneNode(TestGame.engine,TestGame.scene,"Textures\\squares");
box1.Size = new Vector2(64);
box1.Position = new Vector2(64);
TestGame.scene.AddNode(box1);
box1.Body.LinearVelocity = new Vector2(150, 0);
box1.Body.Acceleration = new Vector2(0, 100);
单元测试位于StunEngine0.5Test项目的TestGame.cs的TestPhysics()方法中,截图如下:

发布时间:2011/6/1 21:13:32 阅读次数:8013