XNA Shader编程教程系列9- Post process波动效果

Post processing?
Post processing将一个effect,或effect的组合作用到一个图像/帧/视频上,让他们看起来效果更酷,Post processing可以看作对场景施加一个滤镜。
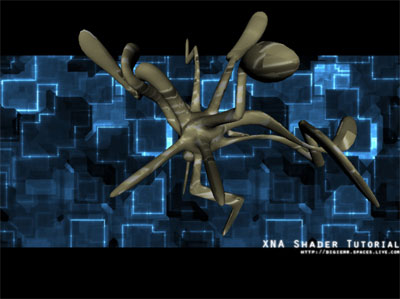
这个例子我们将场景绘制到一张纹理,然后施加波动效果。这让场景看起来象是在水下一样。
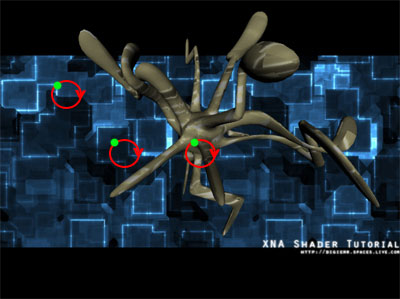
要实现这一点,我们需要使用某种圆周运动改变纹理坐标向量,然后使用这个改变后的纹理坐标载入在ColorMapSampler中的颜色!截图如下:

图中的绿点之是表示某个纹理坐标,我们基于时间让它旋转,对所有纹理坐标都施加这个动作就会实现我们想要的波动效果!
本例中的场景包含一张使用SpriteBatch的背景,使用漫反射光照的三维模型。这个场景被渲染到一个纹理,然后使用这个纹理绘制场景。当绘制纹理时,我们添加了post process shader。因此,我们使用两个shader。一个用于场景中的物体,一个用于post process shader。
实现shader
post process shader只需要用到pixel shader,要实现动态shader,需要定义一个计时器。
float fTimer;
这个计时器由应用程序设置,将用于每个纹理坐标的sin/cos运动,使它们可以旋转!:) 我们还需要ColorMap纹理包含场景,并在每一帧进行更新。
sampler ColorMapSampler : register(s0);
做好准备后,就可以看看Pixel Shader函数了:
float4 PixelShader(float2 Tex: TEXCOORD0) : COLOR
{
    Tex.x += sin(fTimer+Tex.x*10)*0.01f;
    Tex.y += cos(fTimer+Tex.y*10)*0.01f;
    float4 Color = tex2D(ColorMapSampler, Tex);
    return Color;
}
这个shader只是简单地让当前纹理坐标的X和Y分量旋转。在sin中的fTimer+Tex.x使Tex.x在每帧沿X方向变化,同理也发生在Y方向。如果我们使用sin(fTimer)/cos(fTimer)代替Tex.x/Tex.y,所有的纹理坐标将会向着同一方向旋转。你可以尝试一下更好地理解这些参数。
最后,我们需要名为PostProcess的technique:
technique PostProcess
{
    pass P0
    {
        PixelShader = compile ps_2_0 PixelShader();
    }
}
使用shader
将shader加入到我们想要的任何场景中很简单,只需将场景渲染到一个纹理中:
RenderTarget2D renderTarget;
renderTarget = new RenderTarget2D(graphics.GraphicsDevice, pp.BackBufferWidth, pp.BackBufferHeight,
1, graphics.GraphicsDevice.DisplayMode.Format);
graphics.GraphicsDevice.SetRenderTarget(0, renderTarget);

// Render our scene
graphics.GraphicsDevice.SetRenderTarget(0, null);
SceneTexture = renderTarget.GetTexture();
这里的SceneTexture是一个Texture2D对象。现在我们需要显示SceneTexture并将post process effect作用到SceneTexture上:
spriteBatch.Begin(SpriteBlendMode.None, SpriteSortMode.Immediate, SaveStateMode.SaveState);
{
    // Apply the post process shader
    effectPostOutline.Begin();
    {
        effectPostOutline.CurrentTechnique.Passes[0].Begin();
        {
            effectPostOutline.Parameters["fTimer"].SetValue(m_Timer);
            spriteBatch.Draw(SceneTexture, new Rectangle(0, 0, 800, 600), Color.White);
            effectPostOutline.CurrentTechnique.Passes[0].End();
        }
    }
    effectPostOutline.End();
}
spriteBatch.End();
好了!现在我们得到了一个非常简单但又很酷的post process effect。可以试着改变每个纹理坐标运动的方式,你可以得到一个很酷的失真效果。
发布时间:2009/4/29 上午8:13:50 阅读次数:11860
