XNA中的HLSL简单应用
以前一直没搞明白HLSL,最近两天苦下功夫,终于算是学到了HLSL入门了。这里我将通过对一个矩形模型以BassicEffect贴图和通过HLSL贴图作对比,从而掌握在XNA中使用.fx效果文件,和初步了解HLSL。
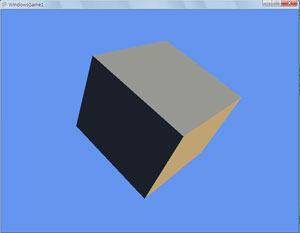
下面先分析一下没有使用贴图时的代码:
public class Game1 : Game
{
GraphicsDeviceManager graphics;
SpriteBatch spriteBatch;
//投影矩阵 Matrix projection;
//观察矩阵 Matrix view;
//矩形的世界矩阵 Matrix world;
//矩形模型 Model cub;
//定义贴图纹理和效果(先声明,暂时不使用)
Texture2D text;
Effect effe;
//是否在暂停状态
bool isPause = false;
KeyboardState preks = Keyboard.GetState();
public Game1()
{
graphics = new GraphicsDeviceManager(this);
Content.RootDirectory = "Content";
}
protected override void Initialize()
{
//初始化投影矩阵
projection=Matrix.CreatePerspectiveFieldOfView(MathHelper.PiOver4, GraphicsDevice.Viewport.AspectRatio, 1f, 100000f);
//初始化观察矩阵
view = Matrix.CreateLookAt(Vector3.Forward * 500, Vector3.Zero, Vector3.Up);
//初始化矩形的世界矩阵
world = Matrix.Identity;
base.Initialize();
}
protected override void LoadContent()
{
// Create a new SpriteBatch, which can be used to draw textures.
spriteBatch = new SpriteBatch(GraphicsDevice);
//载入矩形模型 cub = Content.Load<Model>("cub");
//载入贴图纹理(暂时不使用)
text = Content.Load<Texture2D>("rocks");
//载入效果(暂时不使用)
effe = Content.Load<Effect>("effe");
//设置效果的Technique
effe.CurrentTechnique = effe.Techniques["technique1"];
}
protected override void Update(GameTime gameTime)
{
//当前按键状态
KeyboardState ks = Keyboard.GetState();
//按S镜头拉远,W镜头拉近
if (ks.IsKeyDown(Keys.S))
{
view *= Matrix.CreateTranslation(-10 * Vector3.UnitZ);
}
if (ks.IsKeyDown(Keys.W))
{
view *= Matrix.CreateTranslation(10 * Vector3.UnitZ);
}
//通过空格键控制是否暂停
if (ks.IsKeyDown(Keys.Space) && preks.IsKeyUp(Keys.Space))
{
if (isPause)
{
isPause = false;
}
else
{
isPause = true;
}
}
//控制FillMode
if (ks.IsKeyDown(Keys.A) && preks.IsKeyUp(Keys.A))
{
GraphicsDevice.RenderState.FillMode = FillMode.WireFrame;
}
if (ks.IsKeyDown(Keys.Q) && preks.IsKeyUp(Keys.Q))
{
GraphicsDevice.RenderState.FillMode = FillMode.Solid;
}
preks = ks;
//如果不是暂停状态,自动旋转矩形的世界矩阵,实现旋转效果
if (!isPause)
{
world *= Matrix.CreateFromAxisAngle(new Vector3(1, 1, -1), gameTime.ElapsedGameTime.Ticks * 0.0000001f);
}
base.Update(gameTime);
}
protected override void Draw(GameTime gameTime)
{
graphics.GraphicsDevice.Clear(Color.CornflowerBlue);
foreach (ModelMesh mesh in cub.Meshes)
{
foreach (BasicEffect effect in mesh.Effects)
{
effect.World = world;
effect.View = view;
effect.Projection = projection;
effect.EnableDefaultLighting();
}
mesh.Draw();
}
base.Draw(gameTime);
}
}
可以看到程序的效果如下:
现在我们为例子加入贴图(即前面声名的Texture),因为是使用的Basiceffect类的方法,所以很简单,只需要在foreach (BasicEffect effect in mesh.Effects)的循环体中插入以下代码,
effect.TextureEnabled = true;
effect.Texture = text;
再来看一下效果:

上面就是XNA中最简单的纹理贴图的方法,下面就将进入主要的部分——HLSL渲染。
首先看一段很经典的HLSL代码:
//声明一个4x4的矩阵。传入的参数是世界、观察、投影矩阵的积
float4x4 mWorldViewProjection;
//定义一个VertexShader函数,作为入口,并返回值的语义为POSITION
float4 vs_main(float4 position:POSITION):POSITION
{
//将传入的坐标顶点与世界观察投影矩阵相乘,一交完成三个顶点的交换
return mul(position,mWorldViewProjection);
}
//定义一个PixelShader函数,作为入口,并定义返回语义为COLOR0
float4 ps_main():COLOR0
{
//固定返回白色作为显示颜色 Return float4(1,1,1,1);
}
//开始定义Technique
technique technique1
{
//一个pass
pass pass0
{
//将VertexShader的版本设置为1.1,并将执行函数设置为vs_main
VertexShader=compile vs_1_1 vs_main();
//将PixelShader的版本设置为1.1,并将执行函数设置为ps_main
PixelShader=compile ps_1_1 ps_main();
}
}
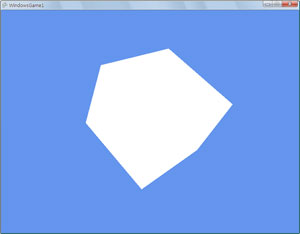
这段代码中包含了一个全局变量,两个全局函数。这两个全局函数分别用于VertexShader和PixelShader,也直接作为VertexShader和PixelShader的入口函数。而全局变量则用在了VertexShader的计算中。代码中定义了一个technique并且包含了一个pass,在这个pass中VertexShader和PixelShader的版本都是1.1。使用这段代码去渲染任何一个模型,得到的都是一个白色的物体。在XNA中使用HLSL的代码如下:
protected override void Draw(GameTime gameTime)
{
graphics.GraphicsDevice.Clear(Color.CornflowerBlue);
//设置HLSL参数
effe.Parameters["mWorldViewProjection"].SetValue(world * view * projection);
effe.Begin();
foreach (EffectPass pass in effe.CurrentTechnique.Passes)
{
pass.Begin();
foreach (ModelMesh mesh in cub.Meshes)
{
foreach (ModelMeshPart part in mesh.MeshParts)
{
GraphicsDevice.VertexDeclaration = part.VertexDeclaration;
GraphicsDevice.Indices = mesh.IndexBuffer;
GraphicsDevice.Vertices[0].SetSource(mesh.VertexBuffer,part.StartIndex, part.VertexStride);
GraphicsDevice.DrawIndexedPrimitives(PrimitiveType.TriangleList, part.BaseVertex, 0, part.NumVertices, part.StartIndex, part.PrimitiveCount);
}
}
pass.End();
}
effe.End();
base.Draw(gameTime);
}
效果如下图:
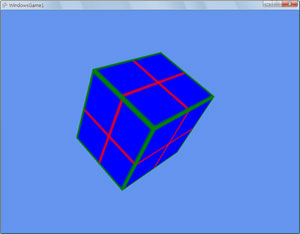
让我们再近一步,用HLSL为我们的贴上纹理。修改Draw方法如下:
protected override void Draw(GameTime gameTime)
{
graphics.GraphicsDevice.Clear(Color.CornflowerBlue);
effe.Parameters["World"].SetValue(world);
effe.Parameters["View"].SetValue(view);
effe.Parameters["Projection"].SetValue(projection);
//下面的参数text类型为Texture
effe.Parameters["diffuseTexture"].SetValue(text);
effe.Begin();
foreach (EffectPass pass in effe.CurrentTechnique.Passes)
{
pass.Begin();
foreach (ModelMesh mesh in cub.Meshes)
{
foreach (ModelMeshPart part in mesh.MeshParts)
{
GraphicsDevice.VertexDeclaration = part.VertexDeclaration;
GraphicsDevice.Indices = mesh.IndexBuffer; GraphicsDevice.Vertices[0].SetSource(mesh.VertexBuffer, part.StartIndex, part.VertexStride);
GraphicsDevice.DrawIndexedPrimitives(PrimitiveType.TriangleList, part.BaseVertex, 0, part.NumVertices, part.StartIndex, part.PrimitiveCount);
}
}
pass.End();
}
effe.End();
base.Draw(gameTime);
}
HLSL代码如下:
float4x4 World;
float4x4 View;
float4x4 Projection;
texture diffuseTexture:Diffuse;
sampler DiffuseTextureSampler = sampler_state
{
Texture = <diffuseTexture>;
MinFilter=linear;
MagFilter=linear;
MipFilter=linear;
};
struct VertexShaderInput
{
float4 Position : POSITION0;
float3 normal:NORMAL;
float2 uv:TEXCOORD0;
};
struct VertexShaderOutput
{
float4 Position : POSITION0;
float2 uv:TEXCOORD0;
};
VertexShaderOutput VertexShaderFunction(VertexShaderInput input)
{
VertexShaderOutput output;
float4 worldPosition = mul(input.Position, World);
float4 viewPosition = mul(worldPosition, View);
output.Position = mul(viewPosition, Projection);
output.uv=input.uv;
return output;
}
float4 PixelShaderFunction(VertexShaderOutput input) : COLOR0
{
return tex2D(DiffuseTextureSampler,input.uv);
}
technique technique1
{
pass Pass1
{
VertexShader = compile vs_1_1 VertexShaderFunction();
PixelShader = compile ps_1_1 PixelShaderFunction();
}
}
渲染效果如下图所示:
就此,我也算对HLSL有了更近步的了解,以后在做的就是多多分析高手写好的HSLS代码。
发布时间:2008/9/5 7:33:41 阅读次数:13063