第9课 相机类和几何体类
本文要介绍的内容是:
- 使用面向对象的方法创建相机类和几何体类。
程序截图如下:
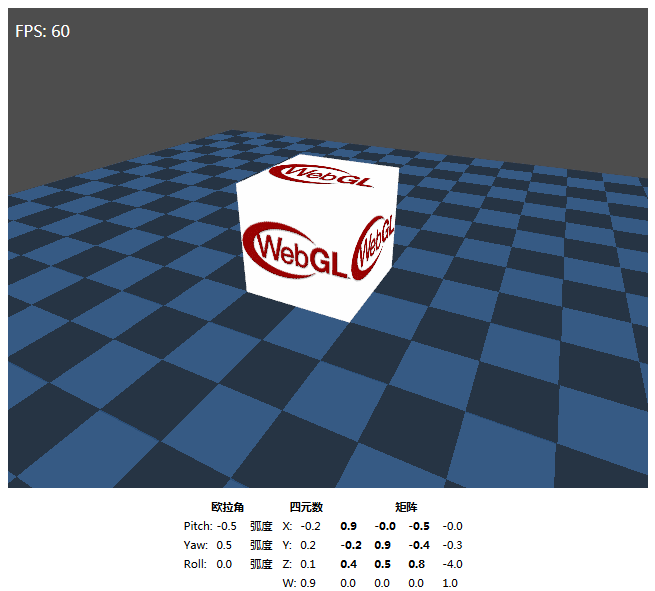
打开Lesson9.html在新窗口中观看示例。
目前为止,我们都是将所有的代码写在了一个文件中,但随着代码的复杂程度增加,可读性会越来越差,自然就会采取面向对象的方法对代码进行封装。我以前接触的较多的是C#,一开始使用javaScript进行面向对象的代码编写还真是有点不适应,参考了些资料才算有一点入门,所以首先先介绍一下在javaScript中面向对象代码的基础知识。
javaScript中的类定义和类继承
在ECMAScript中可以用各种方法创建自己专用的类和对象。比较流行的是使用混合的构造函数/原型方式。这种概念非常简单,即用构造函数定义对象的所有非函数属性,用原型方式定义对象的函数属性(方法),结果所有函数都只创建一次,而每个对象都具有自己的对象属性实例。示例代码如下:
function Car(color,door){
   this.color = color;
   this.doors = door;
   this.arr = new Array("aa","bb");
  }
Car.prototype.showColor(){
 alert(this.color);
}
var car1 = new Car("red",4);
var car2 = new Car("blue",4);
car1.arr.push("cc");
alert(car1.arr);  //output:aa,bb,cc
alert(car2.arr);  //output:aa,bb
创建类的最好方式是用构造函数方式定义属性,用原型方式定义方法。这种方法同样适用于继承机制,称为继承的混合方式,即用对象冒充继承构造函数的属性,用原型链继承prototype对象的方法。代码如下:
function ClassA(sColor){
   this.color = sColor;
}

ClassA.prototype.sayColor = function(){
    alert(this.color);
};

function ClassB(sColor,sName){
   ClassA.call(this,sColor);
   this.name = sName;
}
ClassB.prototype = new ClassA();

ClassB.prototype.sayName = function(){
   alert(this.name);
};

var objA = new ClassA("red");
var objB = new ClassB("blue","Nicholas");
objA.sayColor();
objB.sayColor();
objB.sayName();
在ClassB构造函数中通过使用ClassA.call(this,sColor);,
用对象冒充继承ClassA类的sColor属性;使用ClassB.prototype = new ClassA();,用原型链继承ClassA类的方法。
Object3D基类
3D场景中的对象主要有模型和相机,它们都包含位置、旋转、缩放信息,以及由这三个信息构成的世界矩阵,并且需要对它们进行坐标的转换工作。把这些共性提取出来构成一个基类。这种做法在类似于2.场景中的对象-SceneNode基类。
注意:相机无需使用缩放信息,而且相机的观察矩阵的计算也不使用它的世界矩阵,但为了使用上的方便,还是将缩放信息和世界矩阵放在了基类中。
虽然相机的观察矩阵可以通过它的世界矩阵的逆矩阵求得,但这样不是很方便,通常使用mat4.lookAt(viewMatrix, position,target,up);方法求得观察矩阵,要传入的参数为相机的位置position、相机的观察目标target和相机的向上方向up。
Object3D类的代码如下:
function Object3D() {

	this.position = vec3.fromValues(0,0,0);    // 位置,默认在世界空间的原点

	this.yaw = 0;                              // 欧拉角,绕y轴的旋转
    this.pitch = 0;                            // 欧拉角,绕x轴的旋转
    this.roll = 0;                             // 欧拉角,绕z轴的旋转
    this.quaternion = quat.create()            // 表示旋转的四元数
    quat.identity(this.quaternion);

    this.scale = vec3.fromValues(1, 1, 1);       // 缩放,默认保持原始大小

	this.worldMatrix = mat4.create();          // 世界矩阵
	mat4.identity(this.worldMatrix);
};
// 更新对象的旋转信息
Object3D.prototype.UpdateRotation = function () {
    quat.identity(this.quaternion);
    /* 下列注释掉的代码可以用quat.fromYawPitchRoll方法替代
    quat.rotateY(this.quaternion, this.quaternion, this.yaw);
    quat.rotateX(this.quaternion, this.quaternion, this.pitch);
    quat.rotateZ(this.quaternion, this.quaternion, this.roll);*/
    quat.fromYawPitchRoll(this.quaternion, this.yaw, this.pitch, this.roll);
}
// 更新对象的世界矩阵
Object3D.prototype.UpdateWorldMatrix = function () {
    this.UpdateRotation();
    mat4.fromRotationTranslation(this.worldMatrix, this.quaternion, this.position);
    mat4.scale(this.worldMatrix, this.worldMatrix, this.scale);
};
// 沿对象坐标系中的指定轴axis平移distance距离
Object3D.prototype.TranslateOnAxis = function (axis, distance) {
    var v1 = vec3.create();
    vec3.copy(v1, axis);
    // 将v1轴旋转至指定方向
    vec3.transformQuat(v1, v1, this.quaternion);
    // 在这个方向上添加distance的距离
    vec3.add(this.position, this.position, vec3.mul(v1, v1, vec3.fromValues(distance, distance, distance)));
};
// 沿对象坐标系的X轴平移distance距离
Object3D.prototype.TranslateX = function (distance) {
    var v1 = vec3.fromValues(1, 0, 0);
    this.TranslateOnAxis(v1, distance);
};
// 沿对象坐标系的Y轴平移distance距离
Object3D.prototype.TranslateY = function (distance) {
    var v1 = vec3.fromValues(0, 1, 0);
    this.TranslateOnAxis(v1, distance);
};
// 沿对象坐标系的Z轴平移distance距离
Object3D.prototype.TranslateZ = function (distance) {
    var v1 = vec3.fromValues(0, 0, 1);
    this.TranslateOnAxis(v1, distance);
};
最后的四个方法是用于控制对象在三维空间中的平移的,以后我们会在这个类外部调用这几个方法,实现用键盘控制它的移动。
这个类最主要的任务就是生成一个世界矩阵,处理平移、缩放并不难,处理旋转是个难点。我使用的方法是:用户输入可以控制欧拉角,然后从欧拉角生成四元数,最后通过四元数生成旋转矩阵。下面展开说明一下。
3D中的方位与角位移
以下的内容来自于《3D数学基础:图形与游戏开发》。
3D中有多种方法可以描述方位和角位移,最常用的是——欧拉角、四元数和矩阵。每种技术都有其优点和缺点。
欧拉角
欧拉角的基本思想是将角位移分解为绕三个互相垂直轴的三个旋转的序列。如下图所示:

绕Yaw Axis(即模型空间中的Y轴)旋转对应的是yaw角,称为偏航;绕Pitch Axis(即模型空间中的X轴)旋转对应的是pitch角,称为俯仰;绕Roll Axis(即模型空间中的-Z轴,左手坐标系中为Z轴)旋转对应的是roll角,称为翻滚。
欧拉角的优点是:
- 欧拉角对我们来说很容易使用。它比矩阵和四元数简单得多,这可能是因为欧拉角中的数都是角度,符合人们思考方位的方式。便于使用是其最大的优点。当需要显示方位或用键盘输入方位时,欧拉角是惟一的选择。
- 最简洁的表达方式。欧拉角用三个数来表达方位。在3D中,表达方位不能少于三个数。如果要考虑内存的因素,欧拉角是最合适的描述方位的方法。
- 任意三个数都是合法的。取任意三个数,它们都能构成合法的欧拉角,而且可以把它看成一个对方位的描述。从另一方面说,没有“不合法”的欧拉角。当然,数值可能不对,但少它们是合法的。矩阵和四元数就不一定是这样了。
欧拉角的缺点是:
- 给定方位的表达方式不唯一,可能出现万向锁问题。
- 两个角度间求插值非常困难。
四元数
四元数比较抽象,背后的数学反正我是没搞懂,不过好像也没必要搞懂,你只需会调用glMatrix中的相关函数进行变换即可。
它的优点是:
- 平滑插值。slerp和squad提供了方位间的平滑插值,没有其他方法能提供平滑插值。
- 快速连接和角位移求逆。四元数叉乘能将角位移序列转换为单个角位移,用矩阵作同样的操作明显会慢一些。四元数共轭提供了一种有效计算反角位移的方法,通过转置旋转矩阵也能达到同样的目的,但不如四元数来得容易。
- 能和矩阵形式快速转换。四元数和矩阵间的转换比欧拉角与矩阵之间的转换稍微快一点。
- 仅用四个数。四元数仅包含4个数,而矩阵用了9个数,它比矩阵“经济”得多(当然仍然比欧拉角多33%)。
要获得这些优点是要付出代价的。四元数也有和矩阵相似的问题,只不过问题程度较轻:
- 比欧拉角稍微大一些。这个额外的数似乎没有太大关系,但在需要保存大量角位移时,如存储动画数据,这额外的33%也是数量可观的。
- 四元数可能不合法。坏的输入数据或浮点数舍入误差积累都可能使四元数不合法(能通过四元数标准化解决这个问题,确保四元数为单位大小)。
- 难于使用。在所有三种形式中,四元数是最难于直接使用的。
矩阵
3D中描述坐标系中方位的一种方法就是列出这个坐标系的基向量.这些基向量使用其他坐标系来描述的。用这些基向量构成一个3×3矩阵,然后就能用矩阵形式描述方位,换句话说,能用一个旋转矩阵来描述这两个坐标系之间的相对方位,这个旋转矩阵用于把一个坐标系中的向量转换到另一个坐标系中。
矩阵是一种非常直接的描述方位的形式。这种直接性带来了如下优点:
- 可以立即进行向量的旋转。矩阵形式最重要的性质就是利用矩阵能在物体和惯性坐标系间旋转向量,这是其他描述方法所做不到的。为了旋转向量,必须将方位转换成矩阵形式。
- 矩阵的形式被图形APl所使用。图形API使用矩阵来描述方位。当您和图形API交流时,最终必须将用矩阵来描述所需的转换。程序中怎样保存方位由您决定,但如果选择了其他形式,则必须在渲染管道的某处将其转换成矩阵。
矩阵形式的缺点:
- 矩阵用9个数来保存方位,而实际上方位只需要3个数就能够确定了。这些“多余”的数会导致一些问题。
- 矩阵占用了更多的内存。如果需要保存大量方位,如动画序列中的关键帧,9个数会导致数目可观的额外空间损失。举一个或许不太合适的例子。假设现在做的是一个人的模型动画,该模型被分解为15个块。动画的完成实际是严格地控制子块和父块之间的相对方位。假设每一帧为每一块保存一个方位,动画频率是15Hz,这意味着每秒需要保存225个方位。使用矩阵和32位浮点数,每一帧有8100字节,而使用欧拉角,同祥的数据只需2700字节。对于30s的动画数据,矩阵就比欧拉角多占用162K字节。
- 难于使用。矩阵对人类来说并不直观。有太多的数,并且它们都在-1到1之间。人类考虑方位的直观方法是角度,而钜阵使用的是向量。通过实践,我们能从一个给定的矩阵中得到它所表示的方位,但这仍比欧拉角困难得多,其他方面也不堪如人意。用手算来构造描述任意方位的矩阵几乎是不可能的。总之,矩阵不是人类思考方位的直观方法。
- 矩阵可能是病态的。矩阵使用9个数,其实只有3个数是必需的。也就是说,矩阵带有六阶冗余。描述方位的矩阵必须满足6个限制条件。行必须是单位向量,而且它们必须互相垂直。如果随机取9个数并组成一个3×3阶矩阵,这个矩阵条件不大可能都全部满足那6个限制条件。因此,这9个数不能组成一个有效的旋转矩阵。从另一方面讲,至少对于表达旋转这个目的而言,这个矩阵的结构很不合理,这样的矩阵会出问题,因为它可能导致数值异常或其他非预期行为。
Object3D类的解释
了解了上述知识后,再来看一下Object3D类中的旋转代码。我同时使用了以上三种方式。用户可以修改欧拉角的大小,因为对人类来说,它最直观。代码在构造函数中:
this.yaw = 0;                              // 欧拉角,绕y轴的旋转
this.pitch = 0;                            // 欧拉角,绕x轴的旋转
this.roll = 0;                             // 欧拉角,绕z轴的旋转
在UpdateRotation方法中,将欧拉角转换为四元数,因为我想避免万向节锁问题,而且四元数可以平滑插值:
quat.identity(this.quaternion);
/* 下列注释掉的代码可以用quat.fromYawPitchRoll方法替代
quat.rotateY(this.quaternion, this.quaternion, this.yaw);
quat.rotateX(this.quaternion, this.quaternion, this.pitch);
quat.rotateZ(this.quaternion, this.quaternion, this.roll);*/
quat.fromYawPitchRoll(this.quaternion, this.yaw, this.pitch, this.roll);
如何将欧拉角转换为四元数?glMatrix自带有quat.rotateY、quat.rotateX、quat.rotateZ方法,但为了减少计算量,我自己写了个quat.fromYawPitchRoll方法,这样做可以减少计算量,DirectX、OpenGL和XNA都有类似的方法。数学原理可以参考维基百科的Conversion between quaternions and Euler angles(http://en.wikipedia.org/wiki/Conversion_between_quaternions_and_Euler_angles)。代码如下:
quat.fromYawPitchRoll = function (out, yaw, pitch, roll) {
    var cy = Math.cos(yaw / 2), sy = Math.sin(yaw / 2),
        spcr = Math.sin(pitch / 2) * Math.cos(roll / 2), cpsr = Math.cos(pitch / 2) * Math.sin(roll / 2),
        cpcr = cp = Math.cos(pitch / 2) * Math.cos(roll / 2), spsr = Math.sin(pitch / 2) * Math.sin(roll / 2);

    out[0] = cy * spcr + sy * cpsr;
    out[1] = sy * cpcr - cy * spsr;
    out[2] = cy * cpsr - sy * spcr;
    out[3] = cy * cpcr + sy * spsr;
}
最后在UpdateWorldMatrix类中生成最后的世界矩阵:
Object3D.prototype.UpdateWorldMatrix = function () {
    this.UpdateRotation();
    mat4.fromRotationTranslation(this.worldMatrix, this.quaternion, this.position);
    mat4.scale(this.worldMatrix, this.worldMatrix, this.scale);
};
在glMatrix中自带有fromRotationTranslation方法,可以同时转换旋转和平移。
其实没有四元数作为欧拉角和矩阵的中间桥梁也是可以的,你可以用glMatrix自带的mat4.RotateX、mat4.RotateY、mat4.RotateZ方法直接从欧拉角生成旋转矩阵,这样也可以节省一点内存。
控制类
控制类可以接受用户的鼠标和键盘输入,控制对象的移动和旋转,思路类似于9.相机控制类,但代码主要参考自Three.js中的FirstPersonControls.js文件。
代码如下:
FirstPersonControls = function (object, domElement) {

    this.object = object;
    this.domElement = (domElement !== undefined) ? domElement : document;

    this.movementSpeed = 10;   // 移动速度为每秒10个单位
    this.rotationSpeed = 1;    // 旋转速度为每秒1弧度

    this.mouseX = 0;
    this.mouseY = 0;

    this.moveForward = false;
    this.moveBackward = false;
    this.moveLeft = false;
    this.moveRight = false;

    this.mouseDragOn = false;

    this.viewHalfX = 0;
    this.viewHalfY = 0;

    if (this.domElement !== document) {

        this.domElement.setAttribute('tabindex', -1);

    }

    this.handleResize = function () {

        if (this.domElement === document) {

            this.viewHalfX = window.innerWidth / 2;
            this.viewHalfY = window.innerHeight / 2;

        } else {

            this.viewHalfX = this.domElement.offsetWidth / 2;
            this.viewHalfY = this.domElement.offsetHeight / 2;
        }
    };

    this.onMouseDown = function (event) {

        if (this.domElement !== document) {
            this.domElement.focus();
        }
        event.preventDefault();
        event.stopPropagation();
        this.mouseDragOn = true;

    };

    this.onMouseUp = function (event) {
        event.preventDefault();
        event.stopPropagation();
        this.mouseDragOn = false;
    };

    this.onMouseMove = function (event) {

        if (this.domElement === document) {
            this.mouseX = event.pageX - this.viewHalfX;
            this.mouseY = event.pageY - this.viewHalfY;

        } else {
            // 计算鼠标离开画布中点的距离
            this.mouseX = event.pageX - this.domElement.offsetLeft - this.viewHalfX;
            this.mouseY = event.pageY - this.domElement.offsetTop - this.viewHalfY;
        }
    };

    this.onKeyDown = function (event) {

        event.preventDefault();

        switch (event.keyCode) {

            case 38: /*up*/
            case 87: /*W*/ this.moveForward = true; break;

            case 37: /*left*/
            case 65: /*A*/ this.moveLeft = true; break;

            case 40: /*down*/
            case 83: /*S*/ this.moveBackward = true; break;

            case 39: /*right*/
            case 68: /*D*/ this.moveRight = true; break;
        }
    };

    this.onKeyUp = function (event) {

        switch (event.keyCode) {

            case 38: /*up*/
            case 87: /*W*/ this.moveForward = false; break;

            case 37: /*left*/
            case 65: /*A*/ this.moveLeft = false; break;

            case 40: /*down*/
            case 83: /*S*/ this.moveBackward = false; break;

            case 39: /*right*/
            case 68: /*D*/ this.moveRight = false; break;
        }

    };

    this.Update = function (delta) {

        // 平移
        var actualMoveSpeed = delta * this.movementSpeed;

        if (this.moveForward)
            this.object.TranslateZ(-actualMoveSpeed);
        if (this.moveBackward)
            this.object.TranslateZ(actualMoveSpeed);
        if (this.moveLeft)
            this.object.TranslateX(-actualMoveSpeed);
        if (this.moveRight)
            this.object.TranslateX(actualMoveSpeed);

        // 旋转
        // 将俯仰角度限制在±85度范围内
        var pitchClamped = Math.max(-85 * Math.PI / 180, Math.min(85 * Math.PI / 180, -this.mouseY * 0.01));
        object.yaw = -this.mouseX * 0.01;
        object.pitch = pitchClamped;
    };


    this.domElement.addEventListener('contextmenu', function (event) { event.preventDefault(); }, false);
    this.domElement.addEventListener('mousemove', bind(this, this.onMouseMove), false);
    this.domElement.addEventListener('mousedown', bind(this, this.onMouseDown), false);
    this.domElement.addEventListener('mouseup', bind(this, this.onMouseUp), false);
    this.domElement.addEventListener('keydown', bind(this, this.onKeyDown), false);
    this.domElement.addEventListener('keyup', bind(this, this.onKeyUp), false);

    function bind(scope, fn) {
        return function () {
            fn.apply(scope, arguments);
        };
    };

    this.handleResize();
};
几何体类
严格地说,几何体类应该只包含顶点和索引缓存,shader和纹理应该放在一个材质类中,Three.js就是这样做的,这样使用起来会更灵活,但为了保持简单,我把它们都封装在了一起。
Plane类
Plane类就是创建一个位于XY平面的正方形,类似于24.绘制平面的QuadSceneNode类。代码如下:
// 平面类,默认位于XY平面内
Plane = function (setGl, setCamera, setShader, setTexture) {
    Object3D.call(this);

    this.gl = setGl;
    this.camera = setCamera;
    this.shaderProgram = setShader;
    this.texture = setTexture;

    this.modelViewMatrix = mat4.create();
    mat4.identity(this.modelViewMatrix);

    this.vertexBuffer = this.gl.createBuffer();
    this.gl.bindBuffer(this.gl.ARRAY_BUFFER, this.vertexBuffer);

    var _vertices = [
        -0.5, -0.5, 0, 0.0, 0.0,
         0.5, -0.5, 0, 1.0, 0,
         -0.5, 0.5, 0, 0.0, 1.0,
        0.5, 0.5, 0, 1.0, 1.0,
    ];

    this.gl.bufferData(this.gl.ARRAY_BUFFER, new Float32Array(_vertices), this.gl.STATIC_DRAW);
};

Plane.prototype = new Object3D();

Plane.prototype.Draw = function () {

    this.UpdateWorldMatrix();

    mat4.multiply(this.modelViewMatrix, this.camera.viewMatrix, this.worldMatrix);
    this.gl.uniformMatrix4fv(this.shaderProgram.mvMatrixUniform, false, this.modelViewMatrix);
    this.gl.uniform2f(this.shaderProgram.textureTileAttribute, 10, 10);

    this.gl.bindBuffer(this.gl.ARRAY_BUFFER, this.vertexBuffer);
    // 描述顶点位置在数组中的组织形式
    this.gl.vertexAttribPointer(this.shaderProgram.vertexPositionAttribute, 3, this.gl.FLOAT, false, 20, 0);
    // 描述顶点纹理坐标在数组中的组织形式
    this.gl.vertexAttribPointer(this.shaderProgram.textureCoordAttribute, 2, this.gl.FLOAT, false, 20, 12);
    // 纹理设置
    this.gl.activeTexture(this.gl.TEXTURE0);
    this.gl.bindTexture(this.gl.TEXTURE_2D, this.texture);
    this.gl.uniform1i(this.shaderProgram.samplerUniform, 0);

    this.gl.drawArrays(gl.TRIANGLE_STRIP, 0, 4);
};
立方体类
立方体类绘制一个边长为1的立方体,类似于25. 绘制立方体的CubeSceneNode类。代码如下:
// 立方体类
Cube = function (setGl, setCamera, setShader, setTexture) {
    Object3D.call(this);

    this.gl = setGl;
    this.camera = setCamera;
    this.shaderProgram = setShader;
    this.texture = setTexture;

    this.modelViewMatrix = mat4.create();
    mat4.identity(this.modelViewMatrix);

    this.cubeVertexBuffer = this.gl.createBuffer();
    this.gl.bindBuffer(this.gl.ARRAY_BUFFER, this.cubeVertexBuffer);

    var _vertices = [
        // 前表面
        -0.5, -0.5, 0.5, 0.0, 0.0,
         0.5, -0.5, 0.5, 1.0, 0,
         0.5, 0.5, 0.5, 1.0, 1.0,
        -0.5, 0.5, 0.5, 0.0, 1.0,

        // 后表面
        -0.5, -0.5, -0.5, 1.0, 0.0,
        -0.5, 0.5, -0.5, 1.0, 1.0,
         0.5, 0.5, -0.5, 0.0, 1.0,
         0.5, -0.5, -0.5, 0.0, 0.0,

        // 上表面
        -0.5, 0.5, -0.5, 0.0, 1.0,
        -0.5, 0.5, 0.5, 0.0, 0.0,
         0.5, 0.5, 0.5, 1.0, 0.0,
         0.5, 0.5, -0.5, 1.0, 1.0,

        // 下表面
        -0.5, -0.5, -0.5, 1.0, 1.0,
         0.5, -0.5, -0.5, 0.0, 1.0,
         0.5, -0.5, 0.5, 0.0, 0.0,
        -0.5, -0.5, 0.5, 1.0, 0.0,

        // 右表面
         0.5, -0.5, -0.5, 1.0, 0.0,
         0.5, 0.5, -0.5, 1.0, 1.0,
         0.5, 0.5, 0.5, 0.0, 1.0,
         0.5, -0.5, 0.5, 0.0, 0.0,

        // 左表面
        -0.5, -0.5, -0.5, 0.0, 0.0,
        -0.5, -0.5, 0.5, 1.0, 0.0,
        -0.5, 0.5, 0.5, 1.0, 1.0,
        -0.5, 0.5, -0.5, 0.0, 1.0,
    ];

    this.gl.bufferData(this.gl.ARRAY_BUFFER, new Float32Array(_vertices), this.gl.STATIC_DRAW);

    this.cubeVertexIndexBuffer = this.gl.createBuffer();
    this.gl.bindBuffer(this.gl.ELEMENT_ARRAY_BUFFER, this.cubeVertexIndexBuffer);
    var _cubeVertexIndices = [
        0, 1, 2, 0, 2, 3,    // 前表面
        4, 5, 6, 4, 6, 7,    // 后表面
        8, 9, 10, 8, 10, 11,  // 上表面
        12, 13, 14, 12, 14, 15, // 下表面
        16, 17, 18, 16, 18, 19, // 右表面
        20, 21, 22, 20, 22, 23  // 左表面
    ];
    this.gl.bufferData(this.gl.ELEMENT_ARRAY_BUFFER, new Uint16Array(_cubeVertexIndices), this.gl.STATIC_DRAW);
};

Cube.prototype = new Object3D();

Cube.prototype.Draw = function () {

    this.UpdateWorldMatrix();

    mat4.multiply(this.modelViewMatrix, this.camera.viewMatrix, this.worldMatrix);
    this.gl.uniformMatrix4fv(this.shaderProgram.mvMatrixUniform, false, this.modelViewMatrix);
    this.gl.uniform2f(this.shaderProgram.textureTileAttribute, 1.0, 1.0);

    this.gl.bindBuffer(this.gl.ARRAY_BUFFER, this.cubeVertexBuffer);
    // 描述顶点位置在数组中的组织形式
    this.gl.vertexAttribPointer(this.shaderProgram.vertexPositionAttribute, 3, this.gl.FLOAT, false, 20, 0);
    // 描述顶点纹理坐标在数组中的组织形式
    this.gl.vertexAttribPointer(this.shaderProgram.textureCoordAttribute, 2, this.gl.FLOAT, false, 20, 12);
    // 纹理设置
    this.gl.activeTexture(this.gl.TEXTURE0);
    this.gl.bindTexture(this.gl.TEXTURE_2D, this.texture);
    this.gl.uniform1i(this.shaderProgram.samplerUniform, 0);

    this.gl.bindBuffer(this.gl.ELEMENT_ARRAY_BUFFER, this.cubeVertexIndexBuffer);
    this.gl.drawElements(this.gl.TRIANGLES, 36, this.gl.UNSIGNED_SHORT, 0);
};
在代码中使用这些类
有了这些类,主程序代码可以写得更简练。你需要在startup方法中创建这些对象:
var camera;
var control;
var plane;
var cube;

function startup() {
    …

    // 创建相机并设置初始位置
    camera = new Camera();
    camera.position = vec3.fromValues(0, 1, 2.5);
    // 创建一个平面并旋转90度,使它平躺
    plane = new Plane(gl, camera, shaderProgram, floorTexture);
    plane.pitch = -Math.PI / 2;
    plane.scale = vec3.fromValues(10, 10, 10);
    // 创建一个立方体并设置初始位置
    cube = new Cube(gl, camera, shaderProgram, myTexture);
    cube.position = vec3.fromValues(0, 0.5, 0);
    // 创建一个控制器
    control = new FirstPersonController(camera, canvas);

    …
}
然后在draw方法中调用它们各自的更新方法或绘制方法:
function draw() {
    …
    camera.UpdateViewMatrix();
    control.Update(elapsedTime / 1000);

    gl.uniformMatrix4fv(shaderProgram.pMatrixUniform, false, camera.projectionMatrix);

    gl.viewport(0, 0, gl.viewportWidth, gl.viewportHeight);
    gl.clear(gl.COLOR_BUFFER_BIT | gl.DEPTH_BUFFER_BIT);

    cube.Draw();
    plane.Draw();

    …
}
文件下载(已下载 2662 次)
发布时间:2013/11/3 20:39:40 阅读次数:8869